Wednesday, December 17, 2014

Latch Hook finish

Whew!  I've done latch hook in the past but I'll admit, I've never finished one before!

This is going to be one of my DH's Christmas presents.  I'm glad I got it completely done with time to spare.  Too many times, I've been up well past midnight on Christmas Eve trying to get a gift done.

I found a couple of finishing tutorials online that did help but I thought I'd share how I made my latch hook project into a wall-hanging to hopefully help someone else.  Hopefully, my directions are clear enough that even someone who wouldn't normally even sew on a button can do this.

Here's the completed project from the back.


First, I trimmed the edges.  I chose to have two full rows of canvas around every side.


Then I notched the corners to reduce the bulk and make it easier to fold the edges over.  I actually had to trim one more horizontal canvas from the top edge of this notch in order to fold it over properly.


I forgot to take a photo at the corner where I started.  I was using a 4-ply yarn to stitch the edges down.  When I knotted it to start, I separated the end into two 2-ply sections.  I passed one 2-ply bit through the canvas and then knotted the two sections together.  You can kind of see that in this photo where I was adding another length of yarn.

I lined up my horizontal canvas edge with the second row up and stitched the canvas down.


When I added a new length of yarn, I tucked the ends of the new piece into the canvas fold so they wouldn't show and would be more secure.


Here's the back once all four edges were folded over and sewn down:


Since I wanted this to be a wall-hanging, I had to have something to hang it from.  Here's where the quilter in me came out.  I measured the canvas from edge to edge.  It was about 19" wide. I took a piece of fairly heavy cotton fabric and cut a piece 20" x 5½".  With it right side down, I folded each short end over 1" and ironed them flat.  This gave me a width of 18" for the sleeve.


I took the material to my sewing machine and did a plain straight stitch near the raw edge of each end.

Back to the ironing board, literally.  I folded the fabric in half, right sides together and ironed it flat.  I went back to the sewing machine and ran another straight stitch down the long side near the raw edge.  This seam is ¼" or a bit less.

Back to the ironing board.  I shifted my "tube" of material so that the seam is in the middle and ironed the seam open.  I also made a point of ironing the top and bottom edges flat.


Next, I turned my tube right side out.  The seam is on the back side.


Using black hand-quilting thread, I started attaching the hanging sleeve to the canvas.  This is one long strand of thread.  One end is put through the eye, then both ends brought together and knotted.  The knot is then held as far away from the needle as possible which puts the middle of your thread at the eye of the needle.   I put my needle into the tube about ¼" and came out through the top edge.  This hides your knot inside the sleeve.  I then took my needle behind the first horizontal canvas thread below the folded edge.


Then the needle goes back into the folded edge of the sleeve and then to the left just far enough to come out again to the left of the next vertical canvas thread (one canvas hole).  Basically, you are doing horizontal stitches that are hidden inside the hanging sleeve.  If you are left-handed, you are probably going to want to start at the left end of your sleeve and sew to the right.

Continue stitching around the horizontal canvas threads and through the hanging sleeve until you get to the other end.  Knot your thread off.  I knotted mine around one of the canvas threads.

Rotate the canvas 180° and sew the bottom edge of the hanging sleeve the same way you did the top.  Here's the sleeve completely attached.  You can see that it is just inside the folded over canvas at the top and at the sides.  This gives it enough room to be stable yet it's far enough away from the edges that it won't be seen.


Here's the finished latch hook hanging from a cafe curtain rod.  Normally, I have a quilt hanging there but I took it down temporarily for the "photo shoot".


The curtain rod is about 1½" away from the wall which doesn't work too well for latch hook.  I purchased a 7/8" dowel for my husband to use.  He doesn't like me using his tools, so he'll have to cut it down.  I didn't know what kind of hardware to get to attach the dowel flush or almost flush to the wall, so DH is on his own there.  ;-)

Will I ever do another latch hook?  Probably not.  I'd been considering doing one as a rug for my office but the design would have to be something I couldn't live without before I'd do one again.  I will say that this one was better than any of the ones I'd attempted in the past.  Not only was the design printed on the canvas, it came with a chart, like you see in cross stitch.  I didn't even pay attention to the canvas, I went strictly by the chart.  Oh, I also got this on sale for $3.99US so with the sleeve and the dowel, I spent about $7 total.  That's not bad!

Happy Stitching!

Stacy

Saturday, December 6, 2014

La Belle Dame Sans Merci

Hello, Everyone!

I've completed another page on my focus piece, La Belle Dame Sans Merci!  I'm so thrilled to be making noticeable progress on this one.  The knight is probably thrilled too...he's got more of his body now.  His head and arm are not disembodied any more.

It always amazes me how different it looks when I step back and look at it as a whole.  Believe it or not, his armor is a lot of pinkish colors near the top and black and 3371 at the bottom.  It doesn't really show in the photo but the lightest area is Kreinik 032BF.  Love me some bling!

Up next?  PTP Floral Arrangement.  Since I've already done some stitches in it this evening, I am officially more than half way done with this one!

Happy Stitching!

Stacy


Friday, December 5, 2014

Answer #6 - Stitching Supplies

This time it is a two-part question about stitching supplies.

Leigh asked:
Where do you buy floss and fabric? 

This answer is a little involved.  I have so much floss that I've been collecting over the years, I don't have to buy much.  If I'm starting a new pattern, I hit up my stash for the required floss.  Any colors that are going to require more than one skein, I will buy new skeins so that I know I have enough of the same dye lot.  I do have a local quilt store that stocks DMC so if I need only a few skeins, I'll get them there.  Unfortunately, it's expensive there, about 69¢ each.  If I need more than say, 10 skeins, I'll buy them online.

When my local LNS went out of business, I worked her going-out-of-business sale in exchange for stash.  I got a lot of fabric!  I'm pretty set for 28 and 32 counts.

If I do need floss or fabric, I shop primarily at 123stitch.  If I'm doing something like a band sampler where the fabric is visible, I like using dyed fabrics and Silkweaver is my favorite.  Both these companies are in the US.  For online shopping in the UK, I've heard a lot of good things about Cross Stitch Heaven.

Leigh also asked:
I've also never stitched on linen before, so I might try to do a smaller linen project first as a test run. Any tips for switching from aida?

Yes.  Run away from aida.  Sorry, just being a fabric snob.  ;-)

If you've only stitched on Aida, I wouldn't suggest linen. Linen can be great but it tends to have variations in the thickness of the threads.  It also costs more than evenweaves.  What I would recommend is either laguna or jobelan evenweaves.  The best tip I can give is the starting point.  This is very well described and illustrated at Kathy Dyer's site, point #18, so I'll have you check it out there.

Happy stitching!

Stacy

Wednesday, December 3, 2014

2013 HAED Christmas Raffle

Heaven and Earth Designs (HAED), holds a raffle every Christmas.  Each of the last 3 years, I've purchased 2 tickets.  For the 2013 Raffle, I won!  That means that I got to choose a new chart every month of 2014.  I thought I'd recap what charts got added to my stash.


April:  Morning Flight


May:  Little Bee Eater - retired


June:  Fushias


July:  Cosmos


August:  Blue Dragon


September:  Space Traveler


October:  Holiday Friends


November:  Water Hole Master


December:  Little Drummer Boy


Happy Stitching!

Stacy

Thursday, November 27, 2014

New Year SAL

Ok, everyone.  Hope those in the US had a great Thanksgiving!  I know that I ate too much but had a good time with my family.

I'm going to propose a unique stitch along for the coming year (apart from the Mystery Band Sampler SAL).

For those of you who do, or are planning to do, a HAP (huge a** project), let's make an attempt at one HAP finish this year.  Yes, I know, I've never seen the acronym HAP before either.  I just made it up.  ;-)

My definition of a HAP is this:  the smallest dimension of the stitch count is 300.  Did I mention huge?

Currently, I am working on 4 HAPs and planning on starting another one.  They are:
All of these, except Floral Finesse, are already in progress.  I'd really like to finish one...more would be better.

Apart from the project being a HAP, I'd like the only other criteria to be it has to be less than 50% completed as of January 1, 2015.

To participate:
  • Post on your blog that you are doing it.
  • Post in the comments here that you are doing it (so I know who to look in on)
  • Post on your blog, a picture of your HAP(s) as of January 1, 2015.
  • Link back to this post as the home of the SAL.
  • Do an update the first of every month on your progress of your HAP(s).
All the participants will be entered into a drawing to be held on December 10, 2015.  Those who post every month Jan-Dec 2015 will be given one additional entry.  Those who also complete a HAP, will be given one additional entry for each completion.  No, I'm not going to tell you what the drawing is for, but it will be stitching-related.

As of January 6, 2015, this SAL is closed...at least in regards to the drawing at the end of the year.

Happy Stitching!

Stacy

Monday, November 24, 2014

Mystery Band Sampler SAL

I've decided to go ahead with the Mystery Band Sampler SAL!

The SAL will start January 1st, 2015.  There is a limit to the number of participants and the cost is $7 US per participant.  While the cost is in US $, anyone can join.  The currency conversion will be handled by PayPal (you don't need a PayPal account).

Some people have said they are getting error messages from Paypal.  Their payments HAVE gone through.  I will email each person when I get the payment so you'll know if it went through.

You will need to be a member of Facebook.  I will create a closed group for participants only.

If you want to join, you can purchase your spot over there ---->  at the top of the column.  
The SAL will close to new participants on January 7, 2015.

The information that I can tell you is:

  • The sampler will feature a variety of stitches
  • The sampler is mainly based on color (options below)
  • There will be a total of 20 bands
  • Stitch count is 119w x 155h.  On 28ct. this makes the stitched area 4¼" x 5½"
  • Only DMC floss is used
The supplies you will need:
  • Fabric in your choice of color, contrasting with your chosen color scheme would look best
  • Recommended count is 28 to be stitched over 2 threads
  • Fabric should be 10"-11" wide x 11½" - 12½" high.
  • DMC floss - will need white for all colorways, see below for lists
The color options are:
  • Blues
  • Greens
  • Yellows
  • Pinks
  • Grays
  • Purples
If you want another color option, let me know and I'll see if it will work.

Here is the DMC floss you will need for your chosen color scheme.

Blues:  White, 312, 336, 799, 825, 939, 3325, 3752, 3753, 3756
Greens:  White, 504, 564, 890, 909, 910, 912, 913, 954, 3818
Yellows:  White, 725, 726, 727, 728, 743, 746,  782, 783, 3078
Pinks:  White, 814, 816, 818, 819, 961, 962, 963, 3716, 3831
Grays:  White, 310, 317, 318, 413, 415, 535, 762, 3799, 3865
Purples:  White, 153, 154, 209, 210, 550, 552, 553, 3743, 3837

Any questions?  Just post them in the comments.

Happy Stitching!
Stacy

Friday, November 21, 2014

Answer #5 - Stitching a HAED - epically long post

This post was last updated on 28 November 2017.

This one comes from a couple of the Facebook groups that I'm on.
Tips for stitching a HAED?

Well, since I've completed 3 smaller, 1 SAL, 1 large one, and have 5 in progress, I'd say I'm at least a little qualified to answer this.

Some things to know.

Some of the pattern names seem to use a "secret code".  Here are the common abbreviations and terms:
  • MC - Max Color.  The chart has been modified to use as many colors as possible.  Usually around 240 colors.
  • Mini.  This is a smaller version, in overall stitches, of a design.
  • PTP - Petit Point.  Originally charted specifically for 40ct. fabric.  They can be stitched on any count  though.
  • QS - Quick Stitch.  A Quick Stitch is a small section that has been "cropped" from a design.
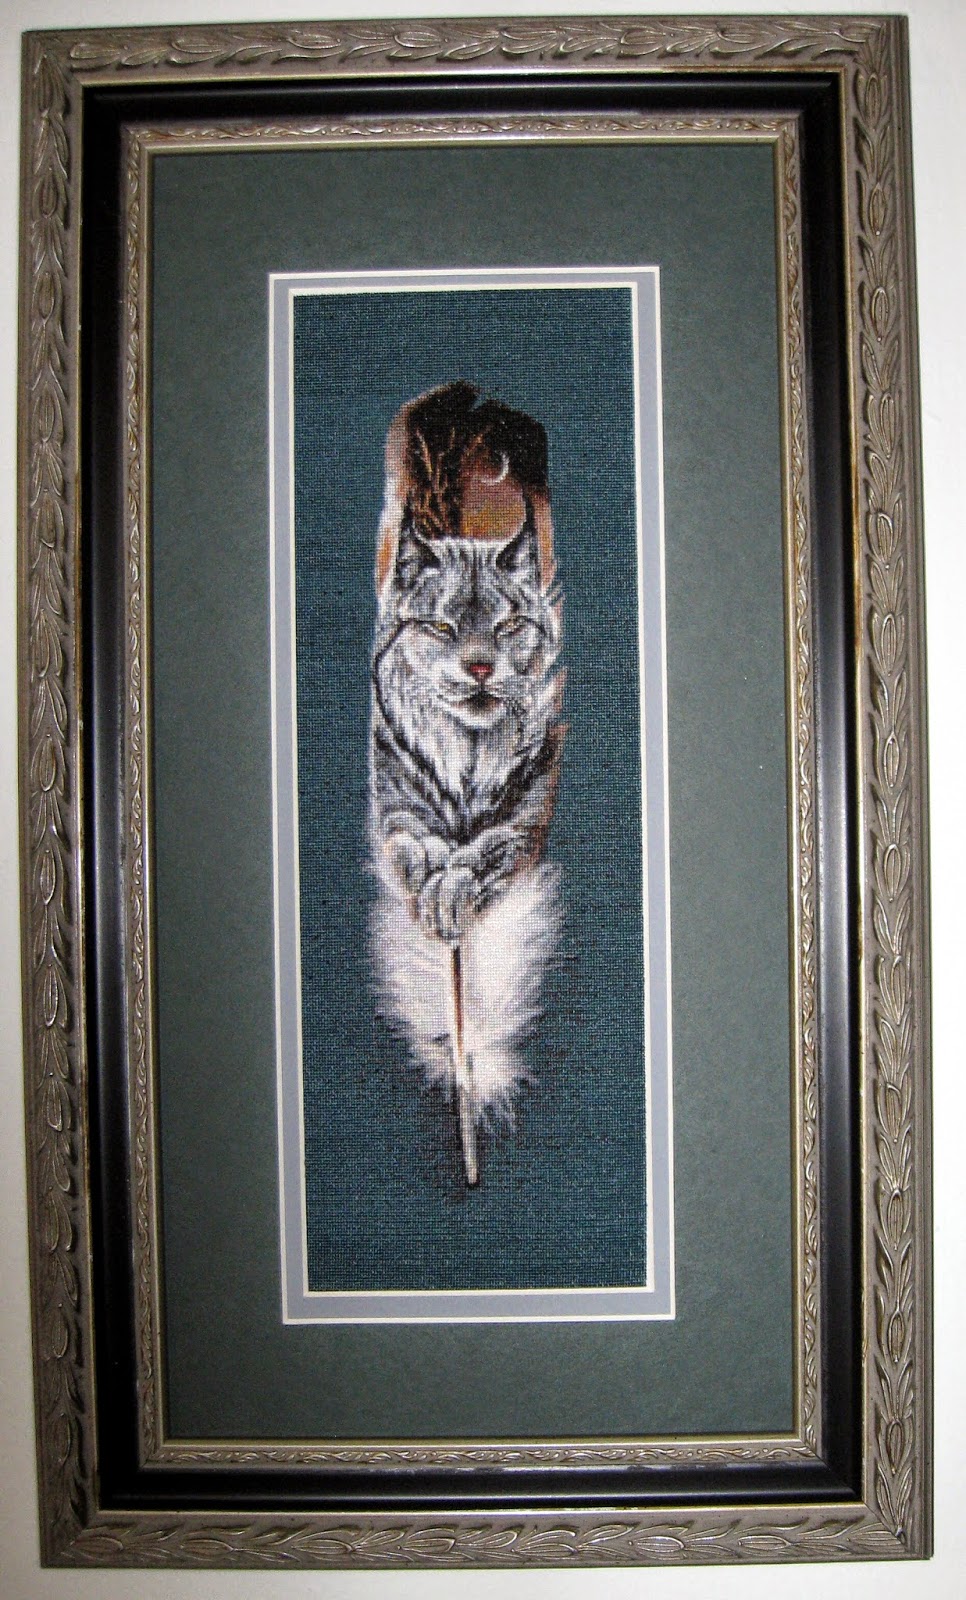
  • SK - Story Keep.  Proportioned like a bookmark.  I've seen them made into bookmarks or framed.
  • SS - Super Sized.  Charts that are maxed out in size. The larger dimension will top out at 999 stitches.
  • TT - Tiny Treasures.  Smaller designs. 
Don't be afraid to stitch a HAED.

They only use full cross stitches.  There are no ¼ stitches, specialty stitches or backstitches.  Apart from the infrequent use of Kreinik 032 #4 Braid (which I always switch to blending filament), only DMC threads are used (well, there are a couple of patterns that call for Anchor brand).

Don't let the size overwhelm you.

While most people think of HAEDs as massive, not all of them are.  The four finishes that I have were:  QS Hummingbird at 187w x 163h (only one color!), QS Dragonflies at 185 x 255 (again, one color) and Twilight Repose at 125w x 317h, and La Belle Dame Sans Merci at 575 x 389.


Now some of their other patterns are HUGE, I will admit.  The largest one that I own is SS Farewell to Anger MC at 999w x 660h.  No, I haven't started it yet.  ;-)

Don't over think it.

If you concentrate on how many stitches you'll have to do to finish, you'll give yourself a headache.  If you think about how many pages you'll have to wade through...again, headache.  I focus on stitching one page at a time.  My reward for finishing a page?  Another page on a different project, hence, my rotation.

Before you start.

Figure out what makes you most comfortable.  Do you usually use a hoop, q-snaps or a scroll frame?  Do you usually stitch in-hand?  Stick with what works for you.

Figure out what stitch count you want to use.  The "default" is 25ct.  I am doing 2 on 25ct. and I just don't care for that count.  I prefer 28ct.  If your eyes aren't up to the smaller counts, switch to what you can see comfortably.  I've seen WIP photos of HAEDs from 6ct. (huge!) to 40ct. (one of mine).  You will have to keep in mind that the smaller the stitch count, the bigger the finished size.  You will also need more floss than the pattern recommends if you use a count smaller than 25ct.

The Patterns - Printed vs. Download

Are you going to purchase a printed (hard copy that gets shipped) or a .pdf (which you download yourself)?

Printed Patterns 

Determine whether you'll need a regular or large print pattern.  If you have issues stitching on 25ct. or higher, I'd recommend the large print.  It's not a huge difference in size, but it will be easier to see especially if there are any similar symbols.  The other benefit to a large print pattern comes if you highlight the chart as you stitch - the boxes are bigger and accommodate the highlighter better.  ;-)

Cons to printed patterns:

The hard copy patterns take longer to receive because the postal service is involved.  They are also more expensive because HAED has to cover their cost for the printing.

Pros to printed patterns:

You don't have to worry about computer issues with downloading, saving and backing up, or the cost of printing them yourself.  The paper is also much better quality than even a print shop would use!

Downloaded Patterns

If you are going to download your pattern, you will only need the large print version if you are going to physically print the pattern and need the bigger symbols.  So many people are using their tablets to stitch from which means a regular print pattern will be fine because the tablet should let you zoom in.

Cons to downloaded patterns:

You do have to have some understanding of computers.  You may have to pay to print the patterns yourself (for paper users).  If you lose your files, you are out of luck.  Backup in more than one place!!

Pros to downloaded patterns:

You can use a tablet to stitch from.  The patterns are available nearly instantly.  Until you print them (if you're going to), they take up no room.  They are less expensive so you have money to buy more!

Material Packs

Personally, I have no experience with the material packs.  I can tell you that I have heard others rave about how good they are.  The only reason that I've never purchased one is due to my existing stash.  I have every color of DMC, most with multiples, plus a large collection of fabric in my favorite counts.  It just doesn't make sense for me to purchase a pack when I already have all the supplies.  Besides, that means I can spend my money on more patterns!

If you do not have a large stash like mine, it might be the best option for you.  If you don't have a LNS (local needlework shop), then it's probably going to be a good choice.

Getting Ready to Stitch

Get all your floss together taking into account what the pattern recommends and allowing for any changes you have made in your fabric count.  Make sure to check your dye lots!  Yes, floss does vary from dye lot to dye lot.  Most of the time, you'd never notice.  But if you're going to put in so many hours on a project, you don't want a wonky dye lot messing things up.  If you are stitching on a small count fabric, say 14ct., and the pattern calls for multiple skeins of black, for instance, you might want to invest in a cone of that color.  Yes, DMC comes in cones!  The easiest place to purchase them, in the US, is 123stitchJoann's also carries them online but they don't list the color number so good luck with that.

How I stitch.

Frames

I use scroll frames.  I'm addicted to my scroll frames and floor stand...seriously! Mine are from Artisan Design.  I have each of my WIPs on its own frame.  That makes them easier to store and makes it very quick to switch from one project to the next.

Floss

My master stash of floss is stored on bobbins.  I pull all the colors needed for a project and put them in numerical order on rings.  Each project has its own complete set of floss.  Most of mine use 310 (black) and every one of my projects has its own bobbin so that I don't have to grab it from another project.

Here's my PTP Floral Arrangement waiting for its turn in my rotation.  You can see how I have the bobbins on rings.  The photo is actually sideways and I was too lazy to change it.  Tilt your head to the right to see how it should be.


Pattern

I purchase the patterns as digital downloads - PDF's.  I print one page at a time.  When I start a new project, I only print the cover page, floss key and first page of the pattern.  I put the cover page in a page protector; the floss key, I cut down, laminate, and 3-hole punch; the first page gets trimmed around the edges and usually pinned to the fabric.  Once I finish a page, I print out the next page and then store everything together in a 3-ring binder.  Then I move on to the next project in my rotation.  Here's God Speed waiting for its turn:


Actually stitching

I start in the upper left hand corner regardless of which page I'm on.  Check out my post on Finding Your Starting Point. I pick a symbol, cut a length of that floss and stitch until that length is finished.  I then pick another symbol in the upper left area and repeat.  If I'm working on a page with a lot of the same color, I will cut a length of that color, separate the strands, and thread all 6 strands onto needles.

I've seen a lot of people who use the parking method.  I have tried this and can do it just fine.  I just can't stand the messy appearance of all those threads on the front of my work.  If it works for you, great!  I use a highlighter to mark off the stitches that I've done.  I'm sure that Staples loves me just from my highlighter purchases!  I've discovered that my local dollar store (Dollar Tree - US) carries highlighters 3 for $1!  Woo hoo!

Here you can see my WIP on my scroll frame, attached to the stand.  The highlighted pattern is just sitting on my fabric.  Yes, I have a daylight lamp (Ott) and I sit in a glider rocker.  All my "gear" was gifts from my husband.  I only had to pay for the fabric, patterns and floss.  Yes, I am keeping him!  In the background, you can see my WIPs that are awaiting their turns.  This photo is old enough that at least one of those has been completed!


I hope this post helps overcome any trepidation you might have in starting a HAED!  If you have any questions, just post them in the comments.  I will answer them if I'm able!

Happy Stitching!

Stacy

Thursday, November 6, 2014

Answer #4 - Sistine Chapel

Well, since I've had a few questions specifically about the Sistine Chapel (SC) that I'm working on, I thought I'd answer them in a separate post.  So this is actually more than one question but I'm "bundling" them.  ;-)

Connie asked:

"I'd love to know how big this piece is gonna end up being when you get done. Number of stitches?"

All of my WIPs have their own progress bar over there -----> 

That will show how many total stitches, number of stitches done, and percentage completed.  For SC, I have completed 30,478 stitches out of 348,950 stitches.  That puts me at 8.73% done.

As to the completed size, I'm doing it over 1 on 34ct. linen.  The pattern is 350w x 997h.  That means the finished piece will be 10.29" x 29.32"  (26cm x 74.5cm).

Michelle asked:
"Because of its length and width it really doesn't fit on to a frame, I would have to fold part of it and work top section then the bottom section ?"

Michelle, that depends on a few things.  First, the frame.  Me, I'm a scroll frame addict.   SC fits just fine on one of my many scroll frames.  I get my scroll frames from Artisan Design and I love them!  Here's a picture:


As you can see, I have plenty of room on either side of the stitched area to allow for framing.  Also to the left, you can make out the clamp that holds my lovely frame onto the floor stand, also from Artisan Design.

The excess fabric is rolled up at the top and the bottom.  Since I started stitching at the top, you might be able to see that the roll at the bottom is thicker due to the extra fabric.

I can't imagine doing a large project in a hoop or even q-snaps.  The thought of not being able to have the excess fabric kept neatly out of the way makes my brain hurt!

Now, a couple of other factors that will decide whether or not it will fit on a frame.  Most, not all, HAEDs recommend stitching on 25ct. over 1.  I'm stitching over 1 but on 34ct. which makes my finished project smaller. If I had tried stitching over 2, the size would be doubled.  On 25ct., this pattern would be 14" wide x 40" long.  As you probably saw in the first answer above, mine is definitely going to be smaller than that.  So the fabric count and stitching over 1 vs. 2 are two other factors.

The size of your frame is the final thing to consider.  I haven't measured this frame, but I will estimate that my fabric is 18" wide so the rod is 20".  That is definitely not my largest frame.  This one is:

The stitched area on this one is 23" wide so that puts the fabric about 28" and the rods at 30".

Michelle also asked:
"...roll the material up in card board roll, so it doesn't get dirty?"

As you can see, the way I have the material rolled on the frame creates a "well".  In other words, the stitched area is recessed below the scroll rods.  The only part of the material that I come into contact with is along the bottom edge of the scroll rod.  Having the floor stand limits contact as well, but the way the fabric is rolled is even more important.  The side of the material that is exposed on the rods is the back of the fabric.  I stitch two-handed.  My right (dominant) hand is underneath the fabric and my left is on top.  My right arm does go under the scroll rod so it does brush against the material but only the back.  My left arm rarely comes into contact with the material but if it does, it's the back.

As I finish a row, or in the case of these two projects shown, two rows, I need to roll the material from the bottom rod onto the top.  I've never had a problem with the little bit of exposed fabric that I do come into contact with getting noticeably dirty.  Yes, this area does get rolled against the stitched area but I've never noticed any dirt or had any problems with dirt.  Since the projects I typically do are so large, they are quite frequently on the scroll frames for yearsLa Belle Dame... has been on the frame since at least 2008.

I hope this information helps.

Happy Stitching!

Stacy


Sunday, November 2, 2014

Sistine Chapel update

Well, the last round of my rotation found me working on The Sistine Chapel.  I just finished page 4!  Due to the switch from Daylight Savings Time, I got in an extra hour of stitching.  My behind was a bit sore from sitting for so long, but it was worth it.

Here's my progress photo:


Next up is my focus piece, La Belle Dame Sans Merci.  The knight will finally start to get a body!  Plus, there will be a bit of sparkle as some of his armor uses blending filament!  I seriously, can't wait.  

Well, I do have to wait a bit.  The Seattle Seahawks are playing at 1:25pm and I have to watch them!  That means that my Dimensions ornament will see at least a little progress.

Happy Stitching!

Stacy

Friday, October 31, 2014

Answer #3 - Rotation

I have gotten this question multiple times so no specific credit to be given on this one.

How do you do your rotation?

Over the last year, I've finally gotten my rotation "tweaked" to perfection - for me at least.  ;-)

I pick one project to be my main focus.  My current focus project is La Belle Dame Sans Merci.  The reason that I have a focus piece is so that I actually get a finish!  As you can tell by my list below, I tend to do LARGE projects!  La Belle... has 40 pages to the pattern!  Okay, the 8th page/row and the entire bottom row aren't full pages but still.


Then I have all my other WIPs:

PTP Floral Arrangement - HAED
Rapunzel (Dawe) - HAED
The Sistine Chapel - HAED
God Speed - HAED
Floral Finesse - The Heart's Content
Heirloom Nativity Sampler - The Victoria Sampler - I have everything ready, just need to put the fabric in the scroll frame

Normally, I would have 8 projects listed in my rotation, but I put an ornament on my 8th scroll frame and I work on it while watching football (American, specifically the Seattle Seahawks) games.

Since La Belle... is my focus piece, I work on it every other time I rotate.  My most recent switches were:

La Belle...
God Speed
La Belle...
The Sistine Chapel

The way I choose what to work on between bouts of La Belle... involves an app.  Yes, there is an app for that!  I have an iPad, and the app I use is called Random Master.  I made a list in the app of all my WIPs except La Belle because I know when I will be working on that one. When I finish a round with La Belle..., I have the app select a random item from my remaining WIPs.  The app keeps track of what it has been selected previously and won't select the same ones again until all of the others have had a turn.  That's great because it gives me some randomness in my rotation but still makes sure that ALL of the items get worked on equally!

Now regarding how much time I spend on each project.  All of the HAEDs get worked on until I finish a page.  If there is a page that is smaller than a full page, I will sometimes do that at the same time.  For instance, on La Belle... the pattern is 8 pages wide but the 8th page in each row is only 33 stitches wide.  Normal pages are 77-80 stitches.  When I got to page 7 on the top row, I also stitched page 8 as part of my "page".

For my non-HAED projects, it can be a bit different how much I choose to do.  For Heirloom Nativity, I will probably do as many bands of the pattern I can until I need to roll the fabric in the frame.  That seemed to work well when I was doing the Heirloom Christmas Sampler.  When I'm working on Floral Finesse, it will probably also be a case of finish one page and move on.  I do know that the first 3 pages will be an exception.  They are all quite small and all use the same color key, so I'll do them as a single session.

Thursday, October 23, 2014

FREE Quilting Block of the Week!!

Oooh, I just found a very cool free block of the week program called Women of the Bible.  If you sign up for the store's newsletter in the next day or two, you might still get in on the first week.  All information is available by clicking on the Women of the Bible link above.

Each week, you get a link for two quilt blocks.  Each block represents a woman from the Bible and has a short devotional.  The first week showcased Eve and Rachel.

In total, there are 40 blocks.  If you miss out on any of the blocks, they are offering a CD after the program is over, for $10.

Happy Stitching!

Stacy


Saturday, October 18, 2014

Online Needlework Show - My Finds

Here are the items that I found that I really liked in the online needlework show.


Village from Blu Cobalto


Poinsettia Star from Fab Reilly Designs


Christmastide from Erica Michaels Designs


Obviously, I have a Winter/Christmas fetish.  These are the only ones I found really interesting.  I've found that I've become quite picky and I won't even consider something I can't see myself actually stitching.  There were quite a few more that made me pause and think but these were the ones that "made the cut". 

Happy Stitching!

Stacy

Friday, October 17, 2014

Online Needlework Show!

Hey Everyone!

The online needlework show has started!

I've always wanted to attend a needlework show but they are usually so far away from me that I can't afford to get to them, let alone have any money to spend on goodies.

The online needlework show is the next best thing.  You get to see all the new stuff and you can be comfy in your jammies while you do it.    When you go to the website, under Viewing, select General and then browse to your heart's content.

After I've viewed the whole show, I'll share what I've found to get me excited!

Happy Stitching and Browsing!

Stacy

Monday, October 6, 2014

Empty Scroll Frames

(Gasp).  I know, it's almost a sin to have empty scroll frames isn't it?  I must really be sinning 'cause I have 3 empty at the moment.  Oh, wait, I just put an ornament on one so that means I'm not quite so evil with only 2 empties.  ;-)

I've been considering what to add to my rotation.  Part of the decision has already been made because I have one wide and one narrow frame available.  For the narrow frame, I've already decided to do Heirloom Nativity Sampler from Victoria Sampler.  I bought the thread packs for this when I bought the pattern, so I know I have everything I need.

For the wider frame, I'm considering doing this:


This is Floral Finesse from The Heart's Content.  It uses 390 DMC colors.  When it came out, that was every color available!

I've had this pattern for awhile.  After all the work I've put into my HAEDs, I know I'm comfortable working over one so that's not an issue.  I don't think I'll use white fabric though.  I'm thinking more ivory.  If I dig through my stash and find a dark blue though, I might use that.

Well, the Seattle Seahawks game is almost ready to start, so I have to go!

Happy Stitching!

Stacy

Answer #2 - Floss coverage

This post was updated on 16 October 2017 with a finished photo of La Belle Dame and further progress on God Speed.

Leonore asked:

"I have one, actually...I remembered you saying something about 25ct over one and coverage, so I went aaaall the way back to read it again (it was with Carla's questions on HAED) and since I'm currently trying to decide what count and over one ore two I should do for my first really big project, I wanted to ask if you could talk a bit about that and possible show some closeups of both God Speed and La Belle Dame for comparison?"

This is a very good question!

There are a couple of things to consider.  Does the pattern have a lot of black (or equally dark color)? Are you going to be stitching on a light colored material?  Remember this is going to be an issue in reverse too (light colors on a dark fabric).

Both my La Belle Dame...(LBD) and God Speed (GS) use quite a bit of black.  LBD has 84,226 stitches in black and GS has 34,036.  Okay, that's more than I thought...dang, that's a lot of black!

On LBD, I had already done one re-start of it so when I decided to stick with 1 strand over 1 thread (1x1), there was no way I was going to re-start again.  There are bits of the fabric that show through but you do have to be fairly close to the project to see that.

With GS, I had already been working on LBD 1x1, so I decided to do 2 strands over 1.  The coverage on 25ct. 2x1 is excellent!  Not a trace of the fabric showing through.  The downside to this is that it is more difficult to actually get the needle and floss through the fabric once you are working where there are already surrounding stitches.  Yes, I do use a larger needle to help open up the holes a bit but with anywhere from 2-6 strands of floss already claiming the hole as theirs', there is a bit of a fight.

Here are a couple of closeups to help show what I mean:


Personally, I won't be using 25ct. again for any project, HAED or otherwise.  I just don't care for it.  I prefer 28ct. and higher.

I don't have a closeup shot of it, but the Twilight Repose that I did was on 28ct. 1x1.  The coverage was great!  The fabric on that one was Ivory and it is 100% stitched.  So with all of that 924 used for the background, that's all you see:  924.


My current WIPs and the pertinent information are:
 All of these are on ivory or natural fabrics.

Happy Stitching!

Stacy