Washing your Needlework
You only need 2 items:
- Lukewarm water
- Dawn or Ivory dish soap; baby shampoo; Orvus
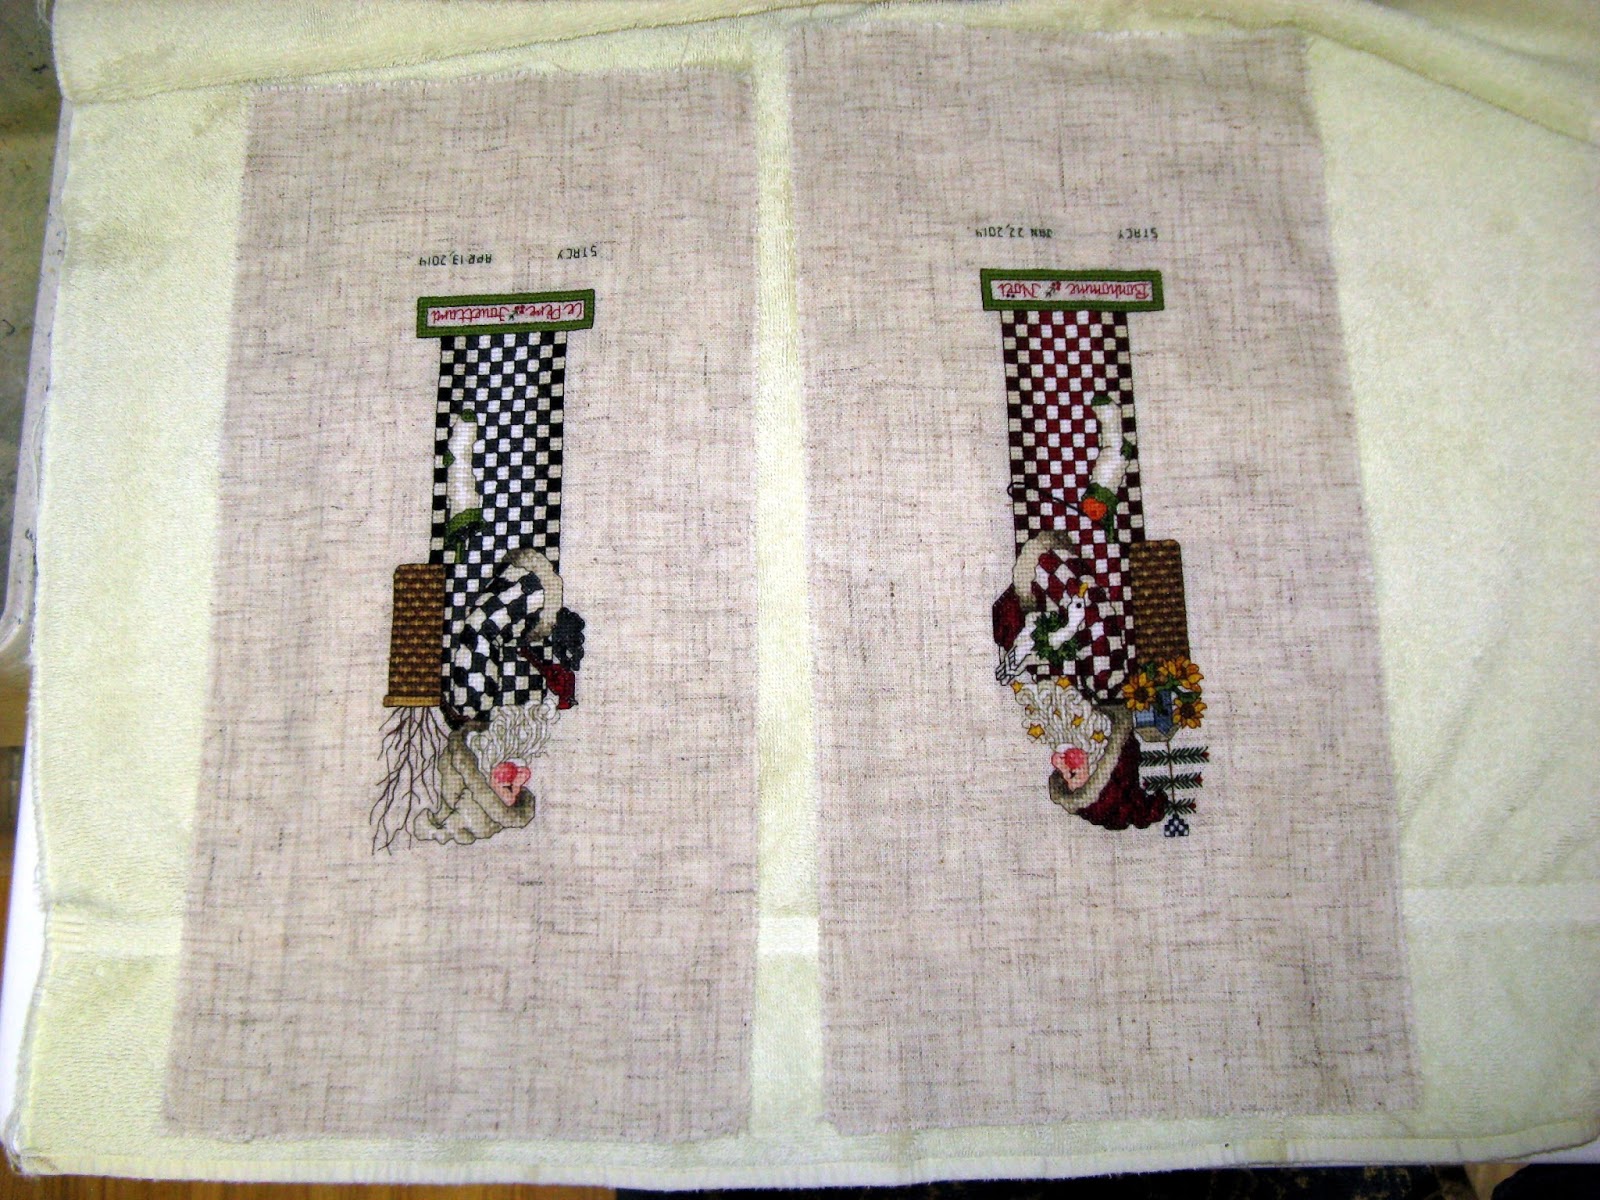
For this tutorial, the two pieces I finished had red and black in them. I went with lukewarm water (about 95°F / 35°C) just in case either color decided to run. In the 35+ years I've been stitching, I've only had black run and only once. By using the cooler end of the warm range, any color that might bleed would be less likely to set in the fabric.
If your floss does bleed, rinse the piece under cold water as long as it takes to remove the bleed.
I filled the tub with about 2" (5cm) of water, adding Dawn dish soap as it was filling. I'd guess that I used about 2T (29cc) of Dawn. The bottle was already low, no, I didn't dump all of that in!

Here it is all bubbly, you can just see one of the Santas peeking through:

There are two reasons I use Dawn: I always have it available 'cause that's what DH uses to wash the dishes and here's the second reason:

The "no phosphate" is the important part of the equation. Ivory dish soap, baby shampoo, and Orvus are also acceptable.
Do NOT use a product like Woolite! Woolite is made for wool. Most threads that we use in our cross stitch are cotton, silk, rayon. Even the DMC website says: "DO NOT use specially formulated wool wash, harsh detergents, or chlorine bleach..."
If you do want to use Orvus, here's a tip to save money: buy Orvus horse shampoo! It's the same thing as Orvus Quilt Soap but significantly less expensive. I have used Orvus in the past but just never get to feed stores any more to buy it. Oh, it works great on people hair too!
Anyway, once I'd gotten my soapy water in the sink, I laid in both Santas. I did a little swishing by hand - maybe 30 seconds. Then I just let them soak for about 20 minutes.
This part is important. I mean it. Rinse using cold water.
I pulled the drain to let the water out and picked up one of the pieces. With cold (hand-numbing) water, I rinsed the first Santa. I hang it over my hands so it's loosely doubled-over without being creased. It's just physically easier to handle.
I held it under the cold water face up and moved it back and forth to make sure it was getting completely covered. I then flipped it over and rinsed it from the back. Finally, there were no signs of any soap bubbles coming off of it so I flipped it to the front and rinsed some more. Yes, I flipped it to the back again and rinsed.
I then laid it flat on a towel and rinsed the other Santa just like the first. Then the second Santa joined the first on the towel.
Now most tutorials will tell you to use a white towel. That's not a bad suggestion but my towel is yellow. I have no problem using a lightly colored towel because I've had it for a while and I know it's been washed multiple times and is not going to bleed any yellow onto my cross stitch.
Since these are skinny Santas (is that an oxymoron?), I only used the one towel 'cause they fit easily.
Now you roll your project up inside the towel...loosely! You don't want to create any creases that you'll just have to iron out.

Nighty-night Santa!
Now, you are going to just hand-squeeze the rolled up towel. Again, you don't want to be rough - that would lead to (gasp) creases.
Here's my Santa burrito:

Next stop: the ironing board!
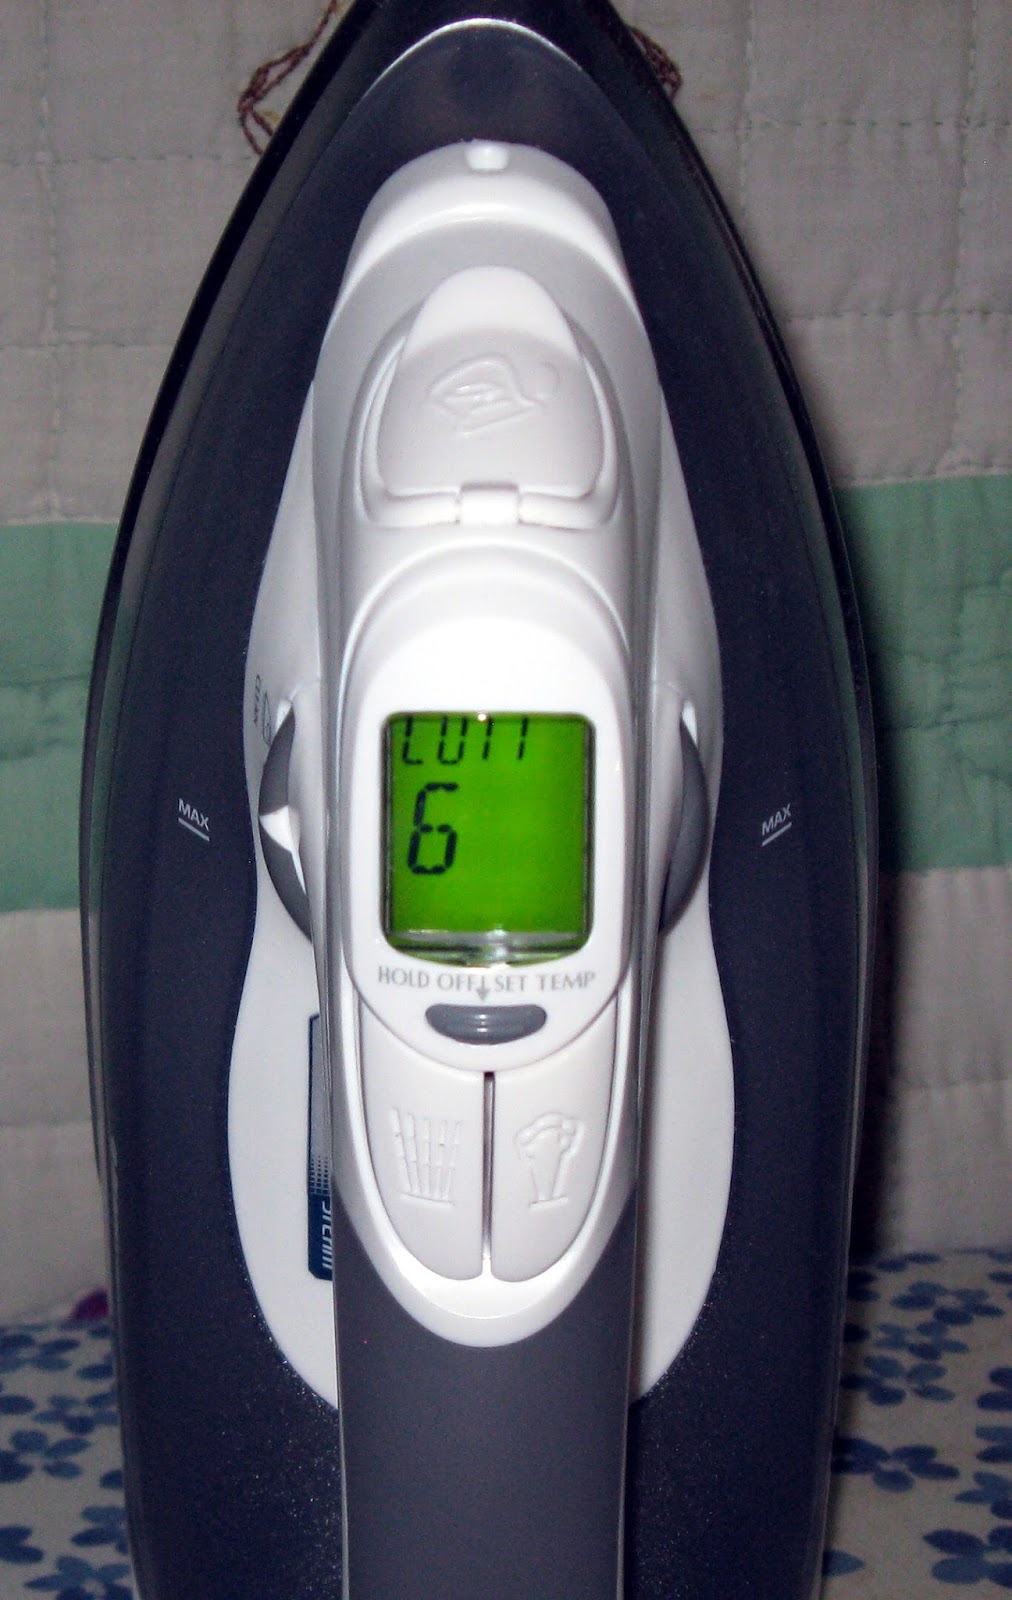
I know that my floss is cotton and the fabric was linen (flax). Cotton and linen can handle 'most anything except a flame-thrower. Avoid flame-throwers.
You can see that I chose COTT / 6 on my iron. That's the cotton setting. Why they didn't use smaller letters to spell out cotton is beyond me. It's a nice iron though, so I'm not really complaining.
I unrolled the towel and set one Santa aside. Using the dry end of the towel, I laid one Santa out for his close-up...with the iron. Santa is face down to start.

I iron from the back until it no longer feels damp. Especially on something this narrow, it is easy to avoid catching any threads with the iron. Go sideways with the iron and there is nothing on the iron to catch the threads.

Once it feels dry from the back, I flip it over and iron from the front. These particular projects didn't have any embellishments so I didn't have to worry about beads or anything. If it was something with beads, I would still iron from the front but I'd put a piece of muslin over it and iron through that. I then ironed his buddy.
Now to make sure that they're completely dry before I frame them, I hung them up overnight.

This is a small section of my quilt design wall. By hanging them here, they stay flat and any remaining moisture will either just evaporate or be soaked up by the flannel behind them (which will evaporate once they're off the wall).
Now they are ready for their frames!
Happy Stitching!
Stacy
5 comments:
In your last blog you said you were going to share this and share it you did! Thank you! I'm glad you pointed out the dangers of using Woolite as I have done so in the past and apparently I had gotten lucky. Usually I use DAWN (I love this soap) or the generic antibacterial. I'm going to link your blog to my dA journal as well so others can enjoy this handy tutorial!
Another great tutorial :)
Great tutorial! I have a piece that I need to wash and I've been dreading it.
Thank you once again for this valuable information. Now that I've read your tutorial I may not be as apprehensive!
Washing projects is really scare, I've only really done it once...so thanks for sharing this tutorial! Do you have any experience with hand dyed fabrics/threads? I know they are much more likely to bleed, but is there still a safe way to wash them?
Post a Comment