Hello!
Due to the lockdown, I have another finish - a fabric wreath. I got the form from a storage unit that hubby bought (like Storage Wars but real life). The form is 18" in diameter. When I started on this one (after the jewelry letter!), hubby asked me if I was "trying to foo foo up the room" because it's now MY room. I told him, of course I was.
I really didn't know how to do it, but thanks to Pinterest, I figured it out. Oh, if you want to follow me on Pinterest, my ID is stacy27c.
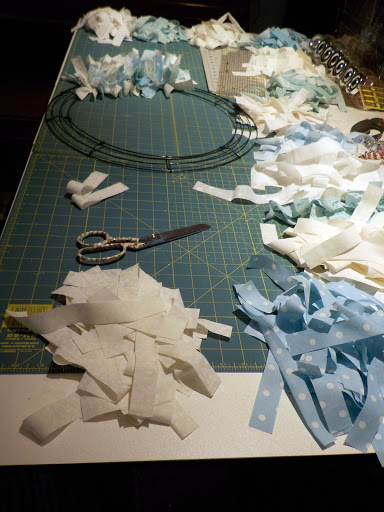
Since most of the tutorials were for 14" wreaths, I knew I was going to need more fabric. I ended up using 468 strips that were cut 1" x 8". I used 13 different fabrics; 7 whites/creams and 6 blues/greens. Most tutorials I read said to tear the fabric for a raggedy look. I'll admit I was lazy and used my rotary cutter.
My form had 9 sections like this:
Here are the fabrics I used, in the order I used them:
I started at the top left pile and tied a strip around the outer 2 rings of the wreath form. I then went clockwise through the piles tying the next strip around the middle 2 rings, then the 3rd strip around the inner 2 rings, then back to the outer 2 rings. For each of the section on the form, I went through my piles 4x for 52 strips per section.
When I finished the 1st section of the form, the last strip was tied on the 2 outer rings. When I started the 2nd section of the form, I kept to the pattern and started on the middle 2 rings.
I only did one tie per strip, like this:
That was sufficient to keep them on the form, plus left them longer for a fluffier wreath. I decided to hang it on my closet door so that I could see it from pretty much anywhere in my studio. Here's my finished wreath:
I do have one more wreath form that I'm going to do up for Christmas. I'll post when I get that one done.
Happy Stitching and Crafting!
Stacy


1 comment:
What a cool project! You are getting a lot done lately.
Post a Comment