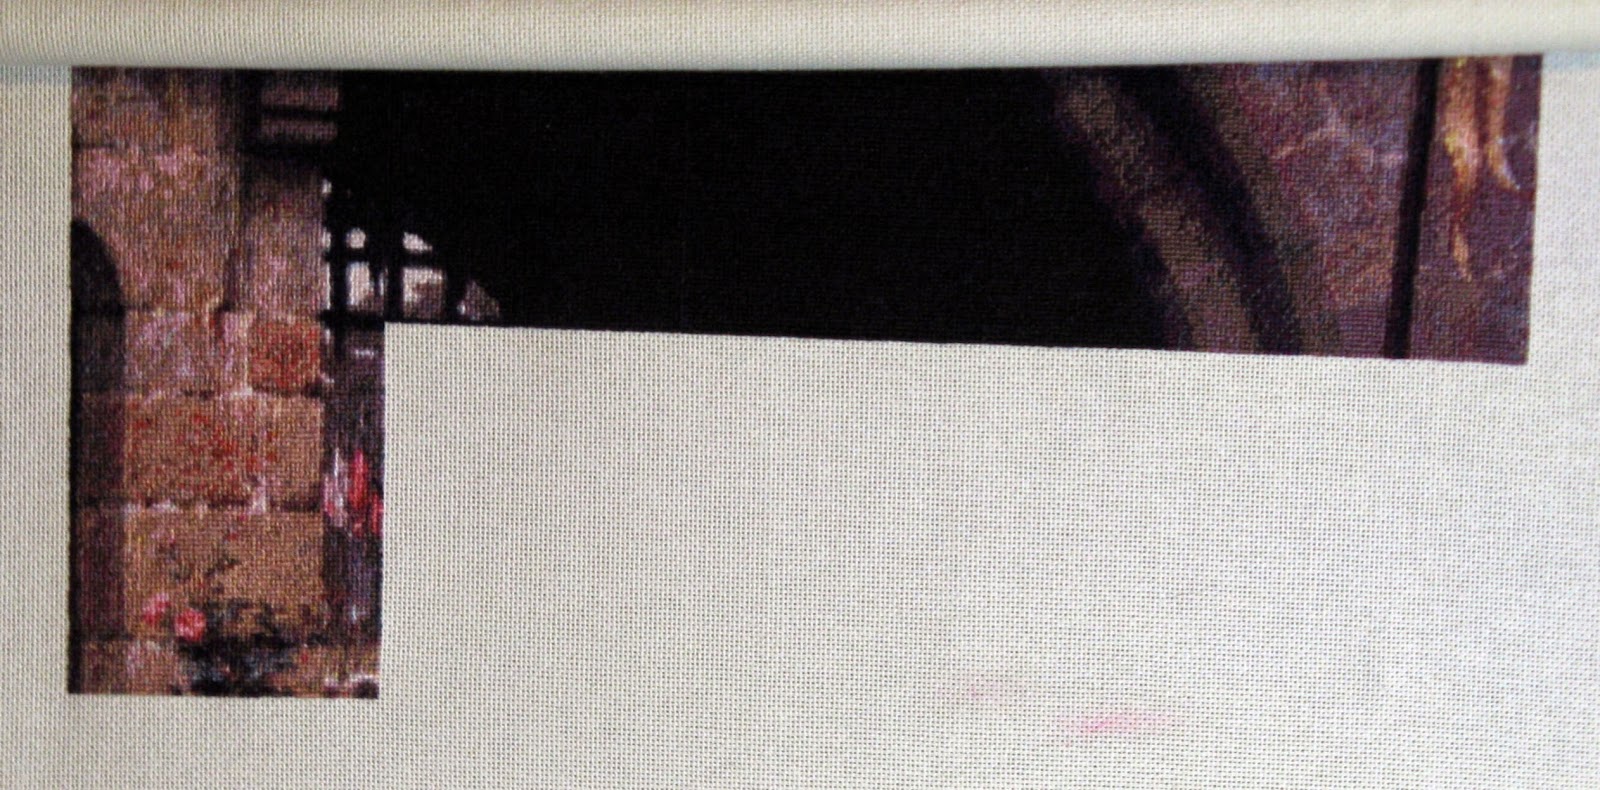
Boy how time does fly! It's time once again, for the HAP SAL update.
I had to look at last month's update to figure out what I'd actually worked on since then.
I did finish that partial page on La Belle Dame. So it went from this to this:
Not a huge difference, but it was progress. Actually, that means I had a row finish! Woo hoo!
After the partial page on La Belle Dame, my randomizer app chose Rapunzel (Dawe) as my next project.
Here she was at the beginning of the year and after the page finish I had a couple of days ago:
She now has one eye, which is great but still kind of creepy. That means that Rapunzel has now gone from 30.3% to 35.05% done.
I did switch back to La Belle Dame a couple of days ago, but I've also been painting another piece of furniture so I've only put in a couple hundred stitches - no photo.
Happy Stitching!
Stacy
Monday, June 1, 2015
HAP SAL Progress Report
Labels:
cross stitch,
HAED,
HAP,
Heaven and Earth Designs,
La Belle Dame Sans Merci,
photos,
rapunzel,
SAL,
wip
Monday, May 18, 2015
New-ish furniture in my stitching room!
I have a table next to my stitching chair to hold my stitching accessories and iPad while I'm stitching. It's not the best setup so I've been looking for something else.
Here's the culprit:
The table is just one of those cheap round things with the screw-on legs. The doily is fine - I made it! There's not a lot of surface room and I have to have ALL my stuff that I might need out and in the way. It also doesn't help that the cat loves to walk under it and occasionally tries to pull the doily (and everything on top) off the table.
So, I've been looking for a small chest of drawers to replace this unfortunate thing. Thanks to my hubby, I was able to get this for no money! He swapped some stuff he'd gotten out of a storage unit (think Storage Hunters) for this at a local second-hand store:
Now it's not really easy to tell from this photograph but this needed some work. Plus, it was a tad too traditional for my craft room.
Here are the rest of the before photos:
Now for the directions on the transformation.
Step 1:
Remove the hardware:
The hardware was, thankfully, easy to remove. Two screws for each handle and they just came right off! I had more trouble finding a screwdriver in my husband's toolbox than I did in taking the handles off.
Step 2:
Sanding
Now hubby was very helpful in letting me use his palm sander. Since I'd never used it before, he put the first piece of sandpaper on for me but made sure that I knew how to do it so that I could change it when it wore out. That bit was easy.
I was using 60 grit sandpaper. If you've never used sandpaper, I'll tell you this: the lower the grit number, the coarser the sandpaper. I really should have been using 40 grit or lower. The finish on this really didn't want to come off! I ended up using the entire package of 60 grit.
The edges of the drawers and the bottom/feet of the piece I had to do by hand. That was fun (heavy sarcasm here). I actually still had to do the left side of the chest after I'd run out of the 60 grit. I'd noticed that the finish seemed a bit gummy and I knew the 100 grit that I had available wasn't going to work so I improvised. We always have a bunch of razor blades around our house (the kind you put in a utility knife, not the kind you shave with), so I grabbed one of them. I used the razor blade like a scraper and took off quite a bit of the remaining finish that way. It even worked on the curve of the foot area! I then used a piece of the 100 grit to do the little bit of finish the blade didn't get. Whew! I'm tired just writing this!
All total, it took me about an hour each evening for 3 evenings. Either my back would start to hurt or my hands would get too tired so I'd quite for the night.
Here it is all sanded.
On the side, near the top, you can probably see where I broke the rule: "Go with the grain". Seriously, that was the only way I could get in there!
Step 3:
Wipe down.
I didn't take photos of this 'cause it was rather boring. Take a damp cloth and wipe the whole piece down. You need to make sure you've gotten all the sawdust off the piece. Let it dry before proceeding to paint.
Step 4:
Hardware prep.
First I needed to determine if the hardware was actual brass or something else. With a handy dandy magnet, I discovered it was not brass. The magnet stuck to it, so it wasn't brass. Hallelujah! (Brass is more difficult to paint.). I gave the hardware a good cleaning with soap and water and a metal scouring pad. Most directions I found said to use steel wool but I didn't have any.
Step 5:
Priming/Painting the hardware.
Ok, I kind of merged this step. Priming and painting should have been separate steps. I already had silver metallic spray paint which I was planning to use. It turns out that it was paint and primer in one! Yeah, me! I took the pieces out to my carport to do this bit. Since it was quite windy, I placed them in a cardboard box with the opening facing me (rather than facing the sky). I sprayed them all, then using a toothpick, I swung the moving part of the handle to the other side and sprayed them again.
They were dry to the touch after 15 minutes so I brought them inside to finish "curing".
Step 6:
Priming/Painting the Drawers
I had thought about doing the finish where you spray paint through a lace curtain panel but I couldn't be bothered to go shopping for one. Yes, I turned down the chance to shop. I was tired.
I did want to have some sort of accent on the finished piece so I thought I'd paint part of the drawer fronts using the same silver paint that I used on the hardware. Out came the painter's tape. The drawer fronts have 3 distinct areas: the center where the hardware was, a medium-sized border area, and a narrow border. I chose to paint the medium-sized border with the silver.
I masked the center panel and the outer border to prevent getting paint on them. Then I sprayed the silver paint on each drawer. I then went back over each drawer immediately just to make sure I had enough paint on them. After about 15 minutes, I took off all the painter's tape. I wanted the paint to be dry to the touch but not necessarily completely dry. If it was too dry, removing the tape might have taken some of the paint with it.
Here they are painted before I took the tape off:
You can see some of the blue from the tape showing through.
And here they are with the tape removed:
Step 7:
Prime/Paint the rest of the piece.
Again, I didn't want this to be a two-step process so I splurged a bit. I purchased Behr Premium Plus Ultra (paint/primer in one - interior). I bought a full gallon because I am going to use it on other projects - a quart would have been more than sufficient for this chest of drawers. I chose a flat finish. The color is called Starless Night.
I started with the drawers. I taped over the silver all the way to the edge so I could paint the center panel of each drawer. I left the tape on for about 10-15 minutes which was a bit too long. While the silver paint had dried overnight, a little bit of it did come off with the tape.
So to keep a nice line between the silver area and the outer edge of the drawer, I placed the tape, painted and immediately removed the tape. No silver came off and I had a clean edge! When I was painting the edges, I didn't paint toward the tape, I painted from a bit over the tape toward the edge. That way, I wasn't "shoving" paint under the edge of the tape.
Here is one of the drawers all painted with the hardware reattached:
I did paint the interior of the drawers as well because they were a bit stained.
Next I painted the body of the piece. I can recommend spending more money on a paint brush than I did. I bought a 2in. wide brush that was under $5. Spend more...really! Here's what happens when you don't:
That's just a few of the bristles that I had to pick off the cabinet that were stuck in the paint. I had to use a pair of tweezers to grab them. The irony is that I finished painting the cabinet with a smaller brush by the same brand with no problems. Go figure.
Here is the completed chest of drawers:
Here's roughly what it cost me to do this project. I did try to list the prices with the sales tax included.
The top drawer now holds the remotes for my tv and dvd player, nail clippers, chapstick, and nail file.
The middle drawer holds my binder with the keys, charts, photos for the WIPs in my rotation.
The bottom drawer is the "snack drawer". Shhhh! Right now, it has a package of coconut cookies.
Happy Stitching!
Stacy
Here's the culprit:
The table is just one of those cheap round things with the screw-on legs. The doily is fine - I made it! There's not a lot of surface room and I have to have ALL my stuff that I might need out and in the way. It also doesn't help that the cat loves to walk under it and occasionally tries to pull the doily (and everything on top) off the table.
So, I've been looking for a small chest of drawers to replace this unfortunate thing. Thanks to my hubby, I was able to get this for no money! He swapped some stuff he'd gotten out of a storage unit (think Storage Hunters) for this at a local second-hand store:
Now it's not really easy to tell from this photograph but this needed some work. Plus, it was a tad too traditional for my craft room.
Here are the rest of the before photos:
Now for the directions on the transformation.
Step 1:
Remove the hardware:
The hardware was, thankfully, easy to remove. Two screws for each handle and they just came right off! I had more trouble finding a screwdriver in my husband's toolbox than I did in taking the handles off.
Step 2:
Sanding
Now hubby was very helpful in letting me use his palm sander. Since I'd never used it before, he put the first piece of sandpaper on for me but made sure that I knew how to do it so that I could change it when it wore out. That bit was easy.
I was using 60 grit sandpaper. If you've never used sandpaper, I'll tell you this: the lower the grit number, the coarser the sandpaper. I really should have been using 40 grit or lower. The finish on this really didn't want to come off! I ended up using the entire package of 60 grit.
The edges of the drawers and the bottom/feet of the piece I had to do by hand. That was fun (heavy sarcasm here). I actually still had to do the left side of the chest after I'd run out of the 60 grit. I'd noticed that the finish seemed a bit gummy and I knew the 100 grit that I had available wasn't going to work so I improvised. We always have a bunch of razor blades around our house (the kind you put in a utility knife, not the kind you shave with), so I grabbed one of them. I used the razor blade like a scraper and took off quite a bit of the remaining finish that way. It even worked on the curve of the foot area! I then used a piece of the 100 grit to do the little bit of finish the blade didn't get. Whew! I'm tired just writing this!
All total, it took me about an hour each evening for 3 evenings. Either my back would start to hurt or my hands would get too tired so I'd quite for the night.
Here it is all sanded.
On the side, near the top, you can probably see where I broke the rule: "Go with the grain". Seriously, that was the only way I could get in there!
Step 3:
Wipe down.
I didn't take photos of this 'cause it was rather boring. Take a damp cloth and wipe the whole piece down. You need to make sure you've gotten all the sawdust off the piece. Let it dry before proceeding to paint.
Step 4:
Hardware prep.
First I needed to determine if the hardware was actual brass or something else. With a handy dandy magnet, I discovered it was not brass. The magnet stuck to it, so it wasn't brass. Hallelujah! (Brass is more difficult to paint.). I gave the hardware a good cleaning with soap and water and a metal scouring pad. Most directions I found said to use steel wool but I didn't have any.
Step 5:
Priming/Painting the hardware.
Ok, I kind of merged this step. Priming and painting should have been separate steps. I already had silver metallic spray paint which I was planning to use. It turns out that it was paint and primer in one! Yeah, me! I took the pieces out to my carport to do this bit. Since it was quite windy, I placed them in a cardboard box with the opening facing me (rather than facing the sky). I sprayed them all, then using a toothpick, I swung the moving part of the handle to the other side and sprayed them again.
They were dry to the touch after 15 minutes so I brought them inside to finish "curing".
Step 6:
Priming/Painting the Drawers
I had thought about doing the finish where you spray paint through a lace curtain panel but I couldn't be bothered to go shopping for one. Yes, I turned down the chance to shop. I was tired.
I did want to have some sort of accent on the finished piece so I thought I'd paint part of the drawer fronts using the same silver paint that I used on the hardware. Out came the painter's tape. The drawer fronts have 3 distinct areas: the center where the hardware was, a medium-sized border area, and a narrow border. I chose to paint the medium-sized border with the silver.
I masked the center panel and the outer border to prevent getting paint on them. Then I sprayed the silver paint on each drawer. I then went back over each drawer immediately just to make sure I had enough paint on them. After about 15 minutes, I took off all the painter's tape. I wanted the paint to be dry to the touch but not necessarily completely dry. If it was too dry, removing the tape might have taken some of the paint with it.
Here they are painted before I took the tape off:
You can see some of the blue from the tape showing through.
And here they are with the tape removed:
Step 7:
Prime/Paint the rest of the piece.
Again, I didn't want this to be a two-step process so I splurged a bit. I purchased Behr Premium Plus Ultra (paint/primer in one - interior). I bought a full gallon because I am going to use it on other projects - a quart would have been more than sufficient for this chest of drawers. I chose a flat finish. The color is called Starless Night.
I started with the drawers. I taped over the silver all the way to the edge so I could paint the center panel of each drawer. I left the tape on for about 10-15 minutes which was a bit too long. While the silver paint had dried overnight, a little bit of it did come off with the tape.
So to keep a nice line between the silver area and the outer edge of the drawer, I placed the tape, painted and immediately removed the tape. No silver came off and I had a clean edge! When I was painting the edges, I didn't paint toward the tape, I painted from a bit over the tape toward the edge. That way, I wasn't "shoving" paint under the edge of the tape.
Here is one of the drawers all painted with the hardware reattached:
I did paint the interior of the drawers as well because they were a bit stained.
Next I painted the body of the piece. I can recommend spending more money on a paint brush than I did. I bought a 2in. wide brush that was under $5. Spend more...really! Here's what happens when you don't:
That's just a few of the bristles that I had to pick off the cabinet that were stuck in the paint. I had to use a pair of tweezers to grab them. The irony is that I finished painting the cabinet with a smaller brush by the same brand with no problems. Go figure.
Here is the completed chest of drawers:
Here's roughly what it cost me to do this project. I did try to list the prices with the sales tax included.
- Chest of drawers -
$10 list pricefree - Sandpaper - $4.50 for 60 grit package (5 sheets) + .75 for1 sheet of 100 grit sandpaper
- Paintbrushes, one 1" and one 2" - $6
- Silver Spray paint/primer - $4.50
- Gallon of Behr Paint/Primer - $40 but I have about 80% still left.
The top drawer now holds the remotes for my tv and dvd player, nail clippers, chapstick, and nail file.
The middle drawer holds my binder with the keys, charts, photos for the WIPs in my rotation.
The bottom drawer is the "snack drawer". Shhhh! Right now, it has a package of coconut cookies.
Happy Stitching!
Stacy
Friday, May 15, 2015
A bit of everything...
Hmm, where to start...
I did finish that little bit I had left on La Belle Dame Sans Merci. Here it is:
The next time I work on this, I'm going to have to roll the scroll frames. That means at least her head is going to disappear...I'm going to miss her!
The next project in my rotation is: Rapunzel (Dawe).
I hadn't been spending as much time as I normally do stitching lately. I'd been working on refinishing a piece of furniture for my craft room. Well, I did get it done...finally! Look for a separate post about what I did and how. ;-)
I've also started selling items featuring photographs that I've taken. Right now, I have 3 different places to shop depending on what you would want to buy. Please feel free to share these links with your friends! Any money I make helps pay bills and buy the occasional bit of stash. No, I'm not getting rich off this (bummer).
Framed prints, pillows, cards, canvas prints, and more: My FineArtAmerica shop.
Unframed Prints, stretched canvas prints, framed prints: SMC Photography
T-Shirts, jewelry, scarves, purses, wallets, and even flip flops!: Tease Tees - All Over Prints
Here are a few of the images that I have online so far:
I did finish that little bit I had left on La Belle Dame Sans Merci. Here it is:
The next time I work on this, I'm going to have to roll the scroll frames. That means at least her head is going to disappear...I'm going to miss her!
The next project in my rotation is: Rapunzel (Dawe).
I hadn't been spending as much time as I normally do stitching lately. I'd been working on refinishing a piece of furniture for my craft room. Well, I did get it done...finally! Look for a separate post about what I did and how. ;-)
I've also started selling items featuring photographs that I've taken. Right now, I have 3 different places to shop depending on what you would want to buy. Please feel free to share these links with your friends! Any money I make helps pay bills and buy the occasional bit of stash. No, I'm not getting rich off this (bummer).
Framed prints, pillows, cards, canvas prints, and more: My FineArtAmerica shop.
Unframed Prints, stretched canvas prints, framed prints: SMC Photography
T-Shirts, jewelry, scarves, purses, wallets, and even flip flops!: Tease Tees - All Over Prints
Here are a few of the images that I have online so far:
Labels:
cross stitch,
HAED,
Heaven and Earth Designs,
La Belle Dame Sans Merci,
photo,
photography,
photos,
wip
Friday, May 1, 2015
Small finish and HAP SAL progress
I recently had a small finish. It's a Santa Claus ornament by TLC Designs, called Santa II. This was a kit I'd had for years. I'd tried to sell the unopened kit in my Etsy shop but didn't have any takers, so I decided I might as well stitch it up.
I think he turned out rather well. This next Christmas, he'll go on my Santa tree in my home office. (I put up 3 trees every year.)
Here he is:
Now for my HAP SAL progress in the past month! I've had progress on 2 of my HAPs.
The first is God Speed. Here's where I started:
And here it is with the next page finished:
I've gone from 23.07% to 26.87% done!
I tried to also finish the partial page I had left on La Belle Dame Sans Merci, but I didn't quite make it.
Here's where I was at the end of last month:
...and here is how much I finished on that partial page:
So on that one, I've gone from 48.21% to roughly 49.16%. Not too shabby for only a few days work!
Happy Stitching!
Stacy
I think he turned out rather well. This next Christmas, he'll go on my Santa tree in my home office. (I put up 3 trees every year.)
Here he is:
Now for my HAP SAL progress in the past month! I've had progress on 2 of my HAPs.
The first is God Speed. Here's where I started:
And here it is with the next page finished:
I've gone from 23.07% to 26.87% done!
I tried to also finish the partial page I had left on La Belle Dame Sans Merci, but I didn't quite make it.
Here's where I was at the end of last month:
...and here is how much I finished on that partial page:
So on that one, I've gone from 48.21% to roughly 49.16%. Not too shabby for only a few days work!
Happy Stitching!
Stacy
Labels:
christmas,
cross stitch,
finish,
finished,
HAED,
HAP,
Heaven and Earth Designs,
La Belle Dame Sans Merci,
photo,
photos,
SAL,
santa claus,
wip
Thursday, April 23, 2015
God Speed page finish!
Any time I get near to a page finish, I just can't seem to stop stitching. Seriously!
Normally, I stop stitching between 10:30 - 11:00pm so that I don't stay up too late (as if that's a real "thing"). Last night, I was close to a page finish. As in there were only 5 colors left to stitch and 2 of those only had a pair of stitches each. I finally put my needle down at 11:55pm...with a page done!
Here's my progress picture:
She's got hair! It's like a beacon in the lower corner. Also, along the bottom, you can hopefully make out the start of two knights' helmets.
Next page is yet another ocean of black and her head. No sign of "her" knight, yet.
Happy Stitching!
Stacy
Normally, I stop stitching between 10:30 - 11:00pm so that I don't stay up too late (as if that's a real "thing"). Last night, I was close to a page finish. As in there were only 5 colors left to stitch and 2 of those only had a pair of stitches each. I finally put my needle down at 11:55pm...with a page done!
Here's my progress picture:
She's got hair! It's like a beacon in the lower corner. Also, along the bottom, you can hopefully make out the start of two knights' helmets.
Next page is yet another ocean of black and her head. No sign of "her" knight, yet.
Happy Stitching!
Stacy
Labels:
cross stitch,
God Speed,
HAED,
Heaven and Earth Designs,
photo,
progress,
wip
Saturday, April 4, 2015
HAP SAL Progress Report - March
Of course, I'm late writing this. I'm in charge...who put me in charge? Oh, yeah - me! You'd think I'd learn.
I have made progress on only one of my HAP pieces in the last month: La Belle Dame Sans Merci. I just noticed that HAED now has a super-sized version of this available. That is NOT the one I'm working on.
Anyway, here are my progress pictures. I thought I'd show the start of the year, previous progress (from February) and my current progress. Did I mention this includes another page finish?! Yeah, me!
As of January 1:
As of my last rotation back in February:
And this one from my page finish about 30 minutes ago:
Ooh, look at how little I have to do for another row finish! Nope, not getting done now. I'm going to rotate my projects like the good little girl I am. [stop laughing...seriously, stop]
Well, I have progressed on this from 41.67% to 48.21% complete!
Since it's nearly 1am, I think it's time for this girl to get some shut-eye!
Happy Stitching! zZzZz....
Stacy
I have made progress on only one of my HAP pieces in the last month: La Belle Dame Sans Merci. I just noticed that HAED now has a super-sized version of this available. That is NOT the one I'm working on.
Anyway, here are my progress pictures. I thought I'd show the start of the year, previous progress (from February) and my current progress. Did I mention this includes another page finish?! Yeah, me!
As of January 1:
As of my last rotation back in February:
And this one from my page finish about 30 minutes ago:
Ooh, look at how little I have to do for another row finish! Nope, not getting done now. I'm going to rotate my projects like the good little girl I am. [stop laughing...seriously, stop]
Well, I have progressed on this from 41.67% to 48.21% complete!
Since it's nearly 1am, I think it's time for this girl to get some shut-eye!
Happy Stitching! zZzZz....
Stacy
Labels:
HAED,
HAP,
Heaven and Earth Designs,
La Belle Dame Sans Merci,
photos,
progress,
SAL,
wip
Friday, April 3, 2015
Answer #9 - Finding your starting point
I saw this on one of the cross stitch groups I belong to on Facebook and I thought I'd answer it here.
When starting a project in the top left corner of fabric how do you center it?
There are two ways to tackle this. One involves counting (the way I do it) and the other involves measuring.
Let's start with the measuring scenario.
Say the pattern you want to stitch is 200 stitches wide x 300 stitches high. You want to do it on 14 count fabric. The stitched area is 14.3 inches x 21.4 inches. Your fabric needs to be 20.3 inches x 27.4 inches to allow for framing. (Want to see the detailed information on these figures? Read this post.)
Once your fabric is cut to the correct size, and preferably zig-zagged you will find your starting point. The zig-zagging (or overcasting, blanket stitched, etc.) is to prevent your material from unravelling so that you don't have any problems in the future. For this example, I did it in green so it would show in the photos.
Measure 3 inches in from the left. I have a bunch of lovely counting pins that work great for this!
Then measure 3" down from the top.
This is where you will place the top, left corner stitch.
As long as you measured correctly (overall fabric size and the 3" both ways), you will end up with 3" of fabric on all sides of your finished stitching. Just like a carpenter's mantra: "Measure twice, cut once".
The main reason that I don't use this method is that I tend to round up my measurements before I cut my fabric and I usually have more than 3" but not necessarily an even amount. It might be 3.6" extra on each side and I don't want to deal with measuring 3.6".
Counting, which is the way that I prefer to do it, actually takes longer to do but is more precise.
Fold your fabric in half.
Fold it in half the other way.
Stick a pin in it...at the point where the folds meet.
Carefully unfold your fabric so that you don't disturb the pin. Voila! You have the center of your fabric.
Now you get to start counting. Since my overall example here is using Aida, we're going to assume that this will be stitched over one. Since the stitch count is supposedly 200w x 300h, we're going to need to count half of that either direction. I usually start by counting up, so that means 150. No particular reason for going up first, that's just how I've always done it.
Start counting. If you're well rested with lots of caffeine, you can go 25 at a time. This photo shows going 10 at a time.
Then count another 10. I used a third counting pin for the photo but normally, I would just pull the one from the center and leap-frog them up.
Then you would just keep going until you'd reached the 150 mark (half of your pattern height). I tend to leave a counting pin at the 150 spot and use a pair to do the counting toward the left. In this example, you would end up counting 100 holes to the left (half of your pattern width) to find your starting position.
Happy Stitching!
Stacy
When starting a project in the top left corner of fabric how do you center it?
There are two ways to tackle this. One involves counting (the way I do it) and the other involves measuring.
Let's start with the measuring scenario.
Say the pattern you want to stitch is 200 stitches wide x 300 stitches high. You want to do it on 14 count fabric. The stitched area is 14.3 inches x 21.4 inches. Your fabric needs to be 20.3 inches x 27.4 inches to allow for framing. (Want to see the detailed information on these figures? Read this post.)
Once your fabric is cut to the correct size, and preferably zig-zagged you will find your starting point. The zig-zagging (or overcasting, blanket stitched, etc.) is to prevent your material from unravelling so that you don't have any problems in the future. For this example, I did it in green so it would show in the photos.
Measure 3 inches in from the left. I have a bunch of lovely counting pins that work great for this!
Then measure 3" down from the top.
This is where you will place the top, left corner stitch.
As long as you measured correctly (overall fabric size and the 3" both ways), you will end up with 3" of fabric on all sides of your finished stitching. Just like a carpenter's mantra: "Measure twice, cut once".
The main reason that I don't use this method is that I tend to round up my measurements before I cut my fabric and I usually have more than 3" but not necessarily an even amount. It might be 3.6" extra on each side and I don't want to deal with measuring 3.6".
Counting, which is the way that I prefer to do it, actually takes longer to do but is more precise.
Fold your fabric in half.
Fold it in half the other way.
Stick a pin in it...at the point where the folds meet.
Carefully unfold your fabric so that you don't disturb the pin. Voila! You have the center of your fabric.
Now you get to start counting. Since my overall example here is using Aida, we're going to assume that this will be stitched over one. Since the stitch count is supposedly 200w x 300h, we're going to need to count half of that either direction. I usually start by counting up, so that means 150. No particular reason for going up first, that's just how I've always done it.
Start counting. If you're well rested with lots of caffeine, you can go 25 at a time. This photo shows going 10 at a time.
Then count another 10. I used a third counting pin for the photo but normally, I would just pull the one from the center and leap-frog them up.
Then you would just keep going until you'd reached the 150 mark (half of your pattern height). I tend to leave a counting pin at the 150 spot and use a pair to do the counting toward the left. In this example, you would end up counting 100 holes to the left (half of your pattern width) to find your starting position.
Happy Stitching!
Stacy
Subscribe to:
Posts (Atom)