Showing posts with label framing. Show all posts

Wednesday, July 29, 2015

Framing Needlework Tutorial, part three - Framing!

Here's the third and final installment in this tutorial.  I hope it's been helpful so far.

I should tell you why I do my own framing.  The main reason is cost.  The second reason is having spent so many hours working on these projects, I really don't trust anyone else to have control over them.

Here's what I got and what it cost to do both these Santas.

From PictureFrames.com:
  • Frame x 2
  • Mats x 4
  • Foamcore x 2
  • Acrylic x 2
  • Framing hardware x 2 (there's always left over clips, which I do save)
 The cost for all the above including shipping came to $95.53US or $47.77 per Santa. (That's a total £61.38; €87.61; $131.19AUD)

Additional costs would be the wrapping paper backing and the double-sided tape.  That's less than $2.  The last frame I purchased in a frame shop cost me $90US and that was just the frame!  No mats, glass, foamcore or hardware and I still did all the work!

Now on to the framing!

I pin my projects for framing rather than lacing.  Either way is fine, I just prefer the security of the pins.

You would need these items:
  • Frame
  • Mat(s), optional
  • Spacers (only if no mats)
  • Foamcore
  • Acrylic or glass, UV protective is fine; non-glare will just make the stitching look blurry and isn't protective
  • Stainless Steel Pins (even if lacing)
  • Counting pins or large headed pins
  • Thread - I use hand-quilting thread (unwaxed dental floss is also an option)
  • Needle - this should be a sharp rather than blunt
  • Screwdriver
  • Wire cutters
  • Awl, optional but very useful - I have misplaced mine so I had to do without
  • Ruler 
  • Some sort of blade - I use a quilting rotary cutter but a utility knife would work too
  • Framing clips - what holds your piece in the frame, style may vary
  • Wire
  • Eye hooks (2)
  • Brown paper or wrapping paper
  • Camera if you want a photo of your framed project (you will take a photo during the framing process)
  • Your completed cross stitch, of course
 Mounting the Fabric

This is the most important part of the process.  If you mess this up, it won't look good in the frame no matter how gorgeous (read, expensive) the frame is!

Oh, I should mention that in the photos Santa might appear to be having an identity crisis.  He couldn't make up his mind if he wanted to be wearing red or black.  Just depends on how photogenic he was feeling at the time.

Lay your piece face up on the foamcore:


Get it approximately centered on the foamcore.  Since I decided that I didn't want my "signature" to show, I'm ignoring it for this entire process.


Place a large-headed pin in the center of each side.  This is just to keep it from shifting while you measure.


The order doesn't really matter as long as you do opposites together (top/bottom or left/right).  I measured from the bottom of the stitching to the edge of the foamcore.  I then measured from the top of the stitching to the edge of the foamcore.


In the photos, the bottom was about 2.375" and the top was about 2.5".  I removed the  top and bottom pins to allow me to move the fabric slightly toward the top.  That increased the amount at the bottom and decreased the amount at the top to even it out.  It was a small amount so I didn't have to remove the pins on the sides for the little adjustment.  I replaced the top and bottom pins.

I measured the remaining sides of the project and make any necessary adjustments.

Now this is where I'd say I'm OCD...I'm not, but I seem to have the occasional OCD moment.

Using the counting pins (or other large-headed pins), count from the outside edge of your stitching to the edge of your foamcore.  Ok, I didn't use large-headed pins to count but I was too lazy to get off my butt and grab some.  In this photo, the uppermost twig is the stitching at the edge of the design.  My count is based from the hole that lines up with the twig.  The first pin is 25 holes and the second is at 50 holes from the stitching.  Using multiple pins helps keep you (me really) from losing count.


I kept counting until my pin lined up with the center of the foamcore edge.  It ended up being 62 holes.  I then counted 62 holes from the opposite side of my stitching towards the center of the foamcore edge.  Hmm, 62 holes was a tad bit short so I went to 64 which was still a tiny bit off from the center of the foamcore (where the real, large-headed pin is).  Switching one side to 64 meant that I had to change the other to 64 as well. Making that adjustment let me put pins in the foamcore on both sides at the same distance from the stitching.

I moved my large-headed pins into the "64 hole" and then counted in the other direction (in this case, top and bottom).  The measurements top and bottom also came out to 64 holes.  This is not always the case!  I was really surprised with this one because the fabric is true linen which isn't always "square" due to the fabric threads being uneven thicknesses.  Again, I switched my bigger pins to the appropriate hole.

Now comes the fun hard-on-the-fingers part:  pinning!  You should do this even if you are going to lace your piece.  The pins act as dozens of extra hands to hold the fabric while you lace.

The pins I use are stainless steel because they won't rust!  They are 1" long with small but noticeable heads.


I usually start on one of the long sides, in the middle.  I work from the middle to one corner, then from the middle to the other corner.  I don't measure how far apart they really are but I'd guess ½" - ¾".  Until I have them all in along one side, I leave them sticking out.  I don't think there is a particular reason why I do, I just do.


Once they're all spaced, I push them in.  Sorry it's hard to see in the photo.  I think the little beggars are camera-shy.


I then do the opposite side the same way.  I think I do the long edges first because when I get to the third side, I'm definitely more than half-way done.  I do the same along the other two sides and voila! the pinning is done.


Hmm, there's all that extra fabric  What to do, what to do?  Truss it up I suppose!

I started at the bottom left corner.  Folded the point of the fabric in. 
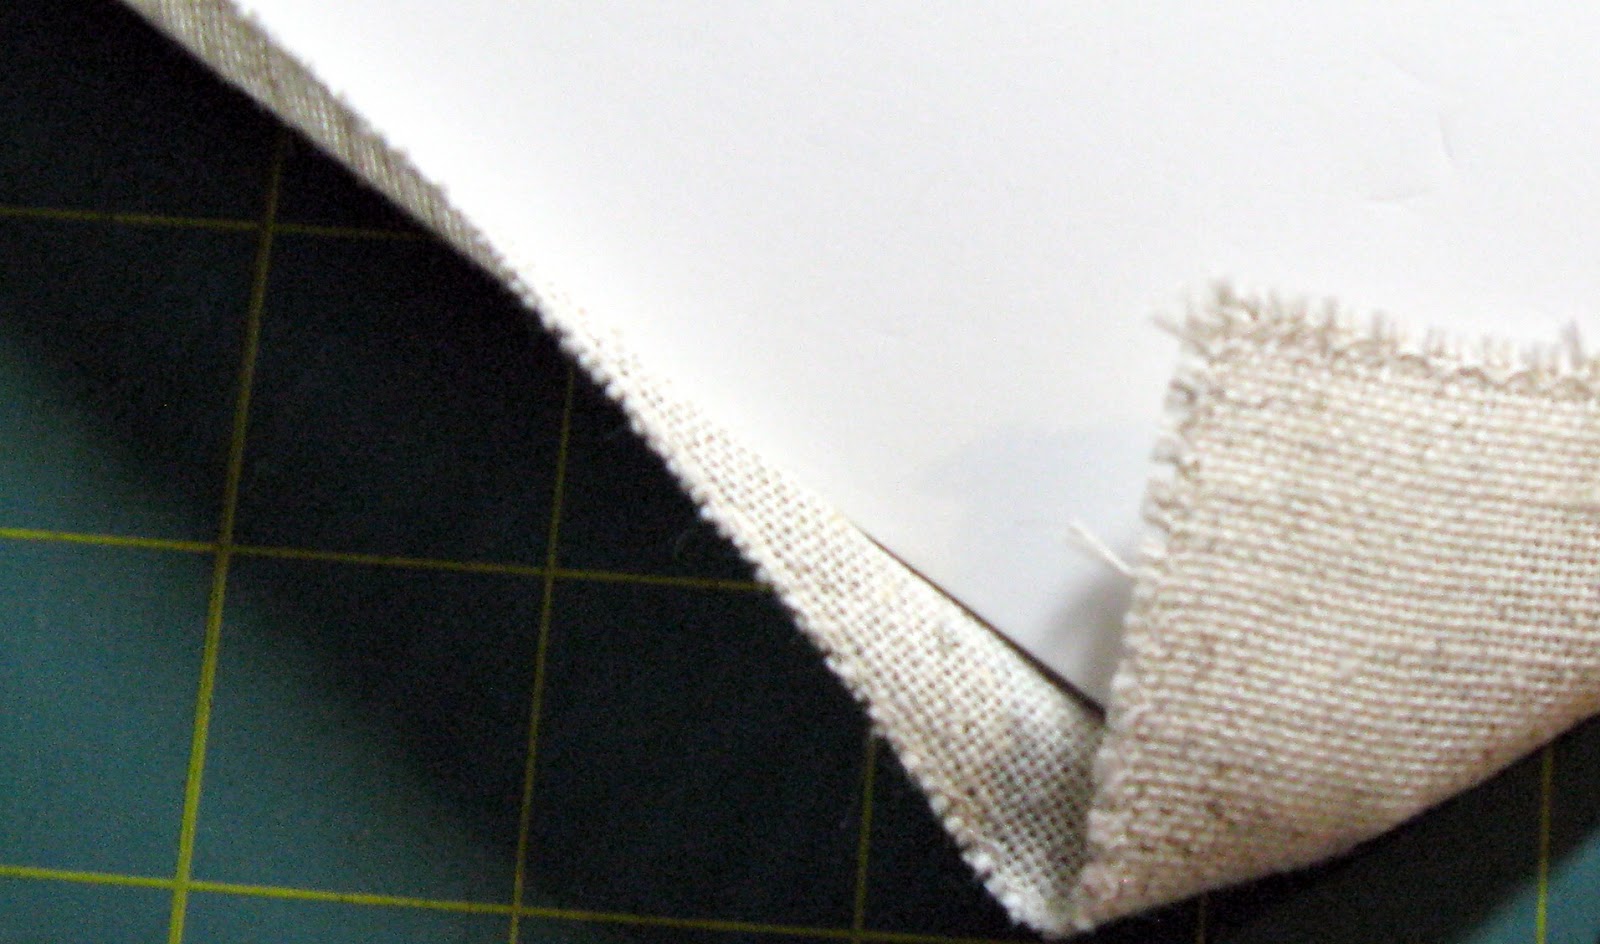

Folded the excess from one side than the other.  This is when I needed the needle and thread.  I use a single thread of hand-quilting thread.  I ran it through the folded fabric and tied a knot.  I should mention that I'm a bit lazy.  Rather than have to cut more thread part-way through, I use a really looonnngg length of thread - probably close to two-yards long.


I then went to the bottom right corner and folded the fabric the same way.  I ran the needle and thread through the corner fabric like in the photo above.  I then zig-zagged my way up the sides (the narrow way) until I reached the top corners.  I do really big zigs and zags.  If you are ultimately lacing your project (removing the pins), you would want to space your zig-zags close together like the pins were and keep the thread as tight as you can.


When I got to the first top corner, I folded it like the previous corners and anchored it with the thread.  I then started zig-zagging from top to bottom (the long length), until I reached the remaining corner.  The corner got folded, threaded and then the thread got knotted off.  I only lace to keep the excess fabric from flopping around like a fish - my pins stay put.  If you are lacing your project, now is when you would remove the pins.

Here it is from the front, looking all tidy.


Whew!  The hard part is done!


Framing the Piece

When I got the box containing my 2 frames, they were well-packaged!  I had a little "prep work" to get them ready to use.  The acrylic had a protective sheet on each side which needed to be removed.  The mats were protected by the 2 pieces of foamcore so I had to separate them (they were lightly taped).

I took the frame and put it face down on my work table.  I then popped in the appropriate mats (white/maroon) and the red Santa.  At this point, that's all I did - no acrylic, no clips, nothing else.  I turned the whole thing over and took a photo.


Sometimes, I hang it on the wall to photograph it but this was easier at the time.  The reason that I photograph it now is no glare or reflections!  It is completely framed/matted and perfectly photogenic.

I disassembled it, put in the acrylic, added the mats, and then popped in Santa.  Now is the time I really looked at it and checked everything.  I made sure there are no fingerprints or dust on the acrylic (the second one took forever to clean - there was a lot of fuzz and fingerprints).  I checked to make sure the mats were aligned properly (they are two separate pieces so they do shift).  I made sure Santa had the same amount of space all around him.

Then I carefully turned him back over and clipped everything into place.  The clips I used came with the frame.


These clips rock!  They are made for one end to fit in the channel on the frame and the other puts just enough pressure on the piece to keep it in place.  They also don't need any special tools, just thumbs!
I started on the long edge and put one near the corner, one near the center and the last one at the corner.  Across the narrow edge, I only used one in the center.

I like to make my framing look as tidy as possible.  I also don't want dust or anything else to get to my fabric so I like to really finish off the back.  I started by putting two-way (2-sided tape) all the way around the back of the frame.  I like to get it as close as possible to the edge.  Since this tape doesn't come in contact with my fabric, I actually use the tape from my trophy shop.  It's not acid-free but like I said, it doesn't touch my fabric.  It's the yellow around the edge.


I could use regular brown paper like grocery bags or parcel wrapping for mailing, but this is a Santa - Christmas wrapping paper!

I cut a piece slightly larger than the entire frame.  The paper is actually sitting on the frame here:


I take it off and peel the yellow paper off one of the tape strips.  I started with one on the narrow edge.  If you look closely at the photo of the tape, you will see that the long strips go to the edge of the frame and the narrow strips fit between the long ones.  By pulling a narrow one first, I still had easy access to the paper on the long strips.  You'll thank me later for that tip!

I put the Christmas paper back over the frame and carefully pressed it onto the one exposed tape working from the center out.  Then I uncovered the tape on the other narrow edge and  keeping the wrapping paper taut, I pressed that end down.  I then did the same to the two remaining sides.

Now I needed to trim the excess paper.  This is when it's handy to have other hobbies - you can "steal" the tools from them.  I used a quilting ruler and rotary cutter.  If you are a quilter, don't freak out - I have a rotary cutter that I use just for stuff like this and a separate one for actual quilting projects.

First I just finger-pressed the paper over the edge of the frame so that I could see where the edge was.


I then put my ruler as close to the edge as possible and whacked off the excess with the rotary cutter.

Here it is all trimmed up:


Now I need to measure for my hanging wire.  I took these photos before I put the paper on because there was better contrast.  I measured the overall height of the frame. You always measure from top to bottom for this step even if your piece is wider than it is tall.  My frame is just under 16½" tall.


Then I measured from the top edge, down just a bit over 4".  The rule of thumb for hanging with wire is to be down ¼ of the overall height.  16.5 ÷ 4 = 4.125 (or 4 1/8").  For the photos, I made a mark down 4 1/8" from the top on both sides.  Normally, I just measure down and use my awl to make a pilot hole.


Now here's a tip from the sad voice of experience.  As you can see in the above photo, my mark is near the edge of the frame.  That's not a problem as long as you check your frame first!  If you have a frame that has a profile like this:

and you tried to place the screw/eye hook for your hanger in the thinner area on the left without checking the length of the screw vs. the thickness of the frame, your screw might end up poking out the front of the frame. Yes, I have had that happen.  Thankfully once was all it took for me to learn that lesson!

Now I attached the hanging hardware.  In this instance, they are eye hooks.  The screwdriver is much easier to hang on to than that tiny little eye hook. So 'round and 'round goes the screwdriver.  I made sure that the base of the eye just barely came into contact with the back of the frame.


The eye should also end up parallel to the side of the frame.


Next I had to attached the wire to the eye hook.  I made a loop near the end of my wire and inserted it in the eye hook.


Then I took the end of the wire and fed it through the loop and pulled it snug.  The excess end wire got wrapped around the main wire.  You may end up using the plier part of your wire cutters to twist the very tip as close to the main wire as possible to prevent it catching on the paper, your finger, etc.


Most of the time, I have way more wire than I need - hence the wire cutters.  I tightly pulled the wire across to the other eye hook then gave it a little slack and made a loop like before.  Once I'd done this, I could see how much excess wire I really had and I cut off the extra.

Just in case you don't know what wire cutters look like, here you go:


These are needle-nose pliers with a wire cutter.  The very base of the "v" of the pliers is the wire cutter.

Here is how much slack I left in the wire.  It doesn't need much, but it does have to have some or it would be impossible to adjust the way the frame hangs.


For reference, the top of the frame is on the left.

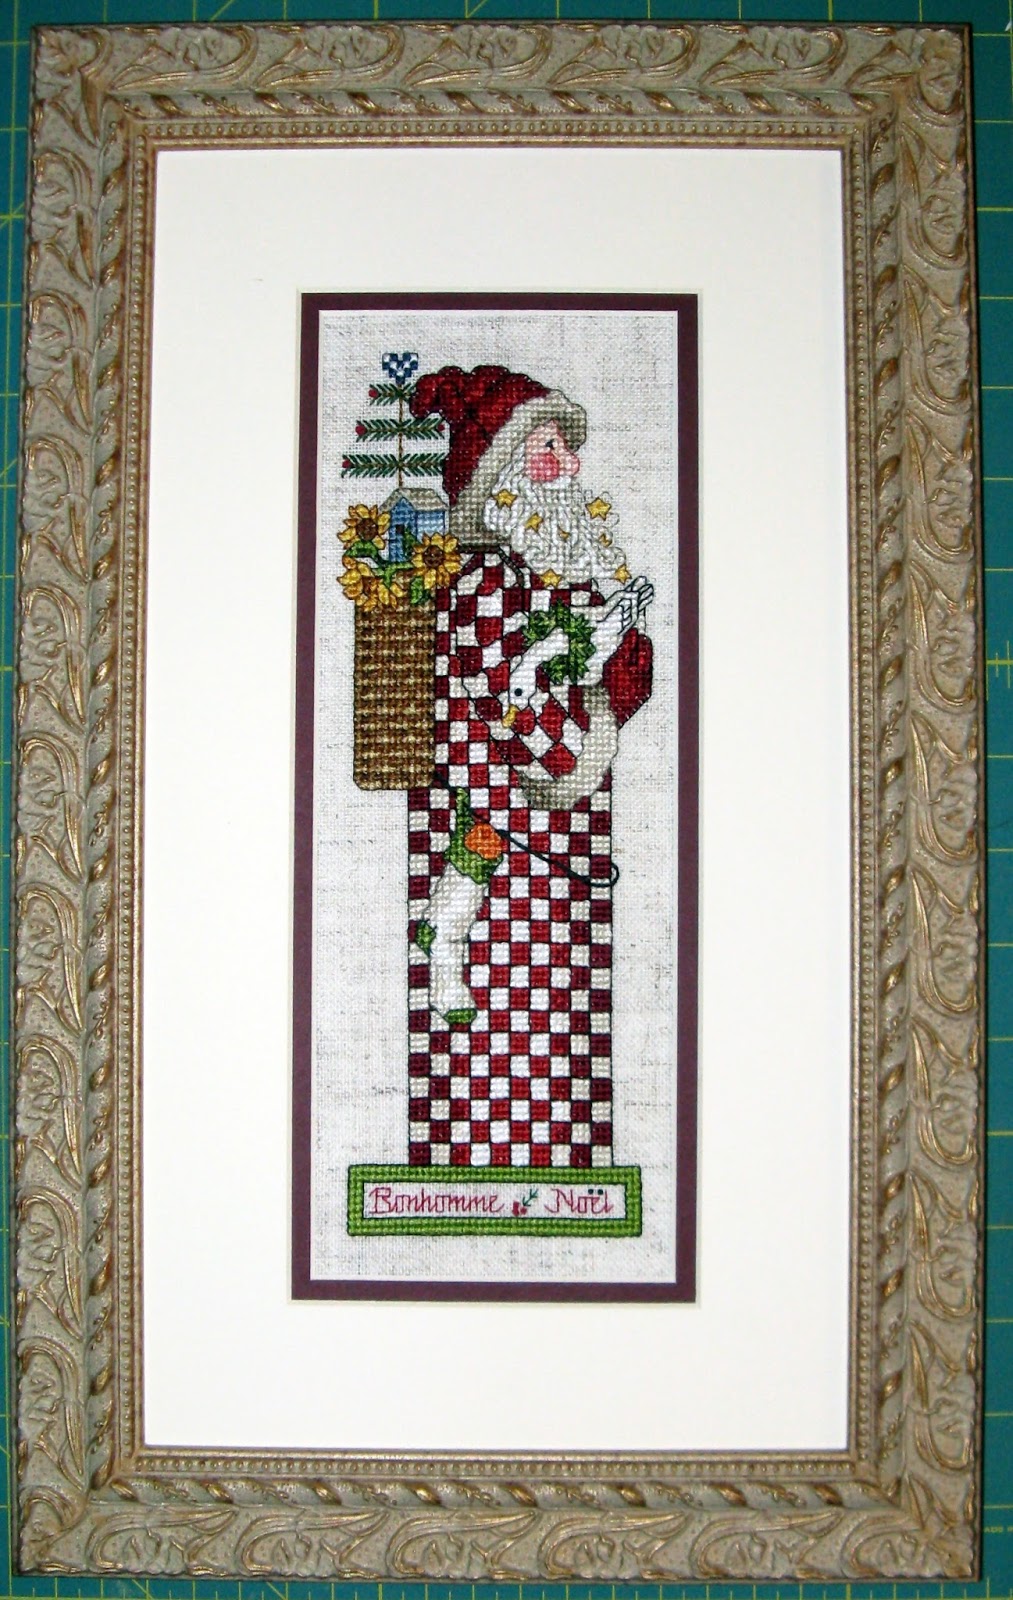
Now for the Santas to finally be seen together:


Happy Stitching!

Stacy

Monday, July 27, 2015

Framing Needlework Tutorial, part one - Picking the Frame

I've had requests for information on how I do my own framing.  Hopefully, I will have detailed enough information in this tutorial to help you frame something yourself.

I am not an expert!  I have read tip and tricks from many reliable sources but am completely self-taught on framing needlework.  I have had multiple projects that I've framed win first place and better ribbons at our local fair.  Proper framing is one of the criteria.

Typically, once I've finished a project the first step is to choose my frame and/or mat(s).  I do this before I wash my piece so that I am handling it less after it is clean.

I get all my frames, mats, foamcore, acrylic (instead of glass) and hanging hardware from PictureFrames.com.  You can get frame and mat samples from them for a small fee if you want a corner sample, or for free if you're fine with just a small side section.  I've always gotten any samples I need added in with an existing order.  I would assume that you would have to pay for the shipping if you are just getting samples.

No, I'm not affiliated with PictureFrames.com.  I'm just a very happy customer.

Measuring your piece

First, I needed to measure the actual stitched area of my piece.  Unless it is something with straight sides, I will have to determine the widest and/or tallest points of my stitching.  Unfortunately, there might be some stitches on one edge that don't line up directly with the stitches on the other edge, so I needed to make sure I had accounted for them all.


On this Santa, the sunflowers on the left and his sleeve on the right are the widest points of the stitching.  Using a quilter's ruler is great because of all the grid lines!  As you can see, the stitching is 3¼" wide.  Always round up to the next 1/8" if it's not an exact fraction of an inch.  For instance, something 3.4" should be rounded up to 3½".

Now this bit is important:  add at least ¼" to this dimension!  Traditional framing usually subtracts about a ¼" from the dimensions of what's being framed (prints) to hold it in place.  Needlework doesn't need to be held in place by the frame or mats because of the extra fabric around the edges that goes around your backing material - usually foamcore.  Personally, I usually add ½" - ¾' to give myself a bit of a fabric border between the stitching and the mat(s).

I didn't take a photo measuring the height of this Santa but overall it is 9 5/8" tall and 3¼' wide. You'll see my "signature" in a few of the following photos.  I did not include that in my measurements because I wanted it hidden behind the mats.  Why did I even sign it then?  So that long after I'm gone, if the frame is ever damaged or someone rescues it from obscurity, it will still be a "signed" piece.  There wasn't really a way to hide it within the design where it would still be visible, so I went this route.

Because this is so narrow, I had to round up to at least 4" for the width because that was the smallest size allowed by the frame company.  I ended up using the dimensions 4 1/8" x 10 3/8" as the size of the "image" I was framing.  Whatever amount you end up adding to the width, make sure you add the same amount to the height or you'll end up with a "unique" framing package!  If you want unique on purpose, go for it!

Choosing mat(s)

Whether you choose to use mats is a matter of personal preference.  Personally, I prefer.  At the very least, a single mat will keep your needlework and the acrylic from touching which is an absolute must!

The best rule of thumb I've heard for choosing a single mat's color is this:  choose the 3rd most predominant color in your artwork.  For a second, or even third mat, I don't know of a rule of thumb.  I choose another color in the artwork.  I don't have a formula for this, I just do a trial and error method.  This is where my mat samples come in.  The cover photo for this Santa had a white-ish and a dark red mat.  Since I liked that combo, that's where I started.  I grabbed a couple different red mats and put them on my piece to see which looked best.


In this instance, I preferred the darker one.  Now to see it with the white-ish mat:


The standard amount for offsetting mats is ¼" so I tried to stack them about that much apart for the visual inspection.  The two colors shown here are Maroon and Antique White.


Choosing a Frame

This is a bit rustic looking so I wanted a frame that was a tad rustic looking too.  Unfortunately, I didn't take any photos with the frame sample(s).  Basically, I would just leave the mats where they were in the previous photo and put the frame samples against the outside edge of my mats until I found the one that screamed, "Me!".  In this case, Wood Gold Cream (WX354) screamed the loudest.

If you have a dark wall, frames with a metallic finish are going to stand out well against your wall.  Try to avoid frames that match your wall because they will blend in too much and your entire piece won't "pop" like it deserves to.

If you are not using any mats, you will need spacers to keep a distance between your needlework and your acrylic/glass.

If you buy an "off the shelf" frame you are going to want to make sure that the area where the cross stitch goes is deep enough to accommodate your glass, mats, and fabric on foamcore.  Most stock frames are made for flat items like prints and photographs.  You would be checking the area in red:


Finishing Kits

Needlework should be mounted on foamcore.  Acid-free is, of course, the best option.

Acrylic or glass?  The main purpose of either is to protect your needlework from the "elements":  dust, pet hair, etc.  I go with acrylic mainly because it is what PictureFrames.com offers.  There are advantages:  it's lighter, less expensive, and more shatter resistant.  Yes, you can get acrylic that protects from UV.  Yes, you can get non-glare acrylic too.  Non-glare and UV Protective are not the same thing.  Non-glare is only what it says.  If you are using more than one mat, non-glare will cause your needlework to look blurry because of its distance from the stitching.

Hanging hardware.  After having used both sawtooth and wire options, I give wire hangers two thumbs up...or a high five, fist bump, whatever.  Wire is stronger and much more adjustable.  It also comes standard with most framing packages or at least it should.  PictureFrames.com automatically includes it with any frame purchase.

Here's a photo of this Santa all framed:


Part two of this tutorial series will cover washing your project.

Happy Stitching!

Stacy

Monday, February 9, 2015

Answer #8 - Figuring fabric sizes

I've seen this one too many times to count.
A quick shout-out to Margie for letting me know about my typos!

How do I figure out how much fabric I need for my project?

I'm sorry, but this question irks me to no end.  No, I'm not a "math person" - that's my sister.  To me it's a sad commentary on the educational system (I'm only referring to the USA).  This question involves arithmetic.  There are no "x" or "y" formulas, just basic  division and addition with some rare multiplication.  Yes, you have to answer a few questions to get to the arithmetic, but they aren't difficult.  For the actual arithmetic, you can use a calculator!

There are three variations on this question and I'll address all three.  Since I'm in the US, I'm using inches.  The premise is the same for centimeters though I've never seen fabric counts listed in centimeters.  You're on your own doing the conversions to metric, sorry.

The first is:  How big does my fabric need to be?

Here are the questions you answer first:

  1. What is the stitch count of your project?
  2. What is the count of the fabric you are going to stitch it on?
  3. Are you going to stitch over 1 or 2 fabric threads?
  4. Are you going to frame it when it's done?
As an example, I'm going to calculate what size fabric I will need to stitch Still Life on a Marble Pedestal:


1.  What is the stitch count?  625 wide x 797 high.
2.  What is the count of the fabric?  28 count
3.  Am I going to stitch over 1 or 2 fabric threads?  over 1
4.  Am I going to frame it?  yes - that means I need to allow 3" per side for framing.

Since I am stitching over 1 on 28 count fabric, that means I will have 28 stitches per inch.
(If I had said over 2, that means I would have 14 stitches per inch - 28 ÷ 2 = 14.  All calculations below would have to be divided by 14.  The project would be twice as large each direction!)

To find how wide I need my fabric, I will divide.  My pattern is 625 stitches wide.  Since my fabric will give me 28 stitches per inch, I will divide 625 by 28.  That will tell me how many inches I will need for 625 stitches.

625 ÷ 28 = 22.3214...

To be safe, I always round UP!  That means I need 23" of fabric for the width of the pattern.  That will only allow for the stitching.  To allow for framing, I want 3" of material on each side of my stitching so I add 6" to the 23" to give me the width of 29" for my fabric.

Now for the height of my fabric. I do the arithmetic using the only number that is different:  the project height in stitches.  So again, I will divide my stitch count by the number of stitches per inch:

797 ÷ 28 = 28.4642...

Again, rounding up means I need 29" for the stitching.  Adding in the 6" for framing gives me (29+6) a height of 35".

So stitching this project on 28 count over 1 and allowing for framing, means I would need a piece of fabric 29" wide x 35" high.

The second is:  What stitch count do I use to fit a certain set of dimensions?

Say you already have a particular frame and you want to see how to make a project fit the frame.

For this example, let's use QS Hummingbird:


This project has a stitch count of 189 wide x 163 high.  This is much more likely to fit an existing frame than my previous example!  ;-)

Let's say you found a gorgoeus frame that has an opening of 16" x 14".  Would you be able to stitch this to fit in your frame?  Let's find out!

Okay, your frame is 16" wide.  Your pattern is 189 stitches wide.  If you divide your number of stitches by the number of inches you have to work with, you'll get this:

189 ÷ 16 = 11.8125

11.8125 equals the number of stitches you would have to have per inch of fabric to just fit into your frame.  Since no fabric has a stitch count of 11.8125, you're going to have to opt for a fabric with more stitches to the inch than 11.8125.  The obvious choices would be 14 count over 1 or 28 count over 2.

Now, let's double-check to see if 14 count would work for both dimensions of the frame.

189 ÷ 14 = 13.5"  for the width      163 ÷ 14 = 11.64"  for the height.

That will leave you approximately 2.5" to work with inside your frame.
16" - 13.5" = 2.5"                14" - 11.64" = 2.36"

That works out to a blank space of about 1.25" on each side of your stitching once it's framed.

That is a bit on the narrow side for a mat but I've actually seen smaller mats.  You could use a mat or just leave the blank gap.  Be sure to use spacers if you have glass but no mat!

The third is:  What can I fit on my already cut piece of fabric?

I have a gorgeous piece of this from Silkweaver:


To find out what will fit on it, here's what I need to know:

1.  What are the dimensions of my fabric in inches?  18" x 26"
2.  What is the stitch count?  32 count
3.  Do I want to frame my finished piece?  yes

This process is like the first example at the top of this post, in reverse.

Since I want to frame whatever I stitch on this, I need to subtract the 3" per side (6" total) for the framing.  That gives me:

18 - 6 = 12 inches       26 - 6 = 20 inches

That means I have 12" x 20" of stitching area.  Since it's 32 count and I tend to stitch over 1, I would multiply to find out what stitch counts my project has to stay within.

12 x 32 = 384          20 x 32 = 640

Now I know that I can choose any of my charts that have a stitch count of 384 x 640 or smaller. 

I've tried to make sure that I included every step required to do the arithmetic but if you see one I've missed, let me know and I'll update this post.

Happy Stitching!

Stacy