I've had requests for information on how I do my own framing. Hopefully, I will have detailed enough information in this tutorial to help you frame something yourself.
I am not an expert! I have read tip and tricks from many reliable sources but am completely self-taught on framing needlework. I have had multiple projects that I've framed win first place and better ribbons at our local fair. Proper framing is one of the criteria.
Typically, once I've finished a project the first step is to choose my frame and/or mat(s). I do this before I wash my piece so that I am handling it less after it is clean.
I get all my frames, mats, foamcore, acrylic (instead of glass) and hanging hardware from PictureFrames.com. You can get frame and mat samples from them for a small fee if you want a corner sample, or for free if you're fine with just a small side section. I've always gotten any samples I need added in with an existing order. I would assume that you would have to pay for the shipping if you are just getting samples.
No, I'm not affiliated with PictureFrames.com. I'm just a very happy customer.
Measuring your piece
First, I needed to measure the actual stitched area of my piece. Unless it is something with straight sides, I will have to determine the widest and/or tallest points of my stitching. Unfortunately, there might be some stitches on one edge that don't line up directly with the stitches on the other edge, so I needed to make sure I had accounted for them all.
On this Santa, the sunflowers on the left and his sleeve on the right are the widest points of the stitching. Using a quilter's ruler is great because of all the grid lines! As you can see, the stitching is 3¼" wide. Always round up to the next 1/8" if it's not an exact fraction of an inch. For instance, something 3.4" should be rounded up to 3½".
Now this bit is important: add at least ¼" to this dimension! Traditional framing usually subtracts about a ¼" from the dimensions of what's being framed (prints) to hold it in place. Needlework doesn't need to be held in place by the frame or mats because of the extra fabric around the edges that goes around your backing material - usually foamcore. Personally, I usually add ½" - ¾' to give myself a bit of a fabric border between the stitching and the mat(s).
I didn't take a photo measuring the height of this Santa but overall it is 9 5/8" tall and 3¼' wide. You'll see my "signature" in a few of the following photos. I did not include that in my measurements because I wanted it hidden behind the mats. Why did I even sign it then? So that long after I'm gone, if the frame is ever damaged or someone rescues it from obscurity, it will still be a "signed" piece. There wasn't really a way to hide it within the design where it would still be visible, so I went this route.
Because this is so narrow, I had to round up to at least 4" for the width because that was the smallest size allowed by the frame company. I ended up using the dimensions 4 1/8" x 10 3/8" as the size of the "image" I was framing. Whatever amount you end up adding to the width, make sure you add the same amount to the height or you'll end up with a "unique" framing package! If you want unique on purpose, go for it!
Choosing mat(s)
Whether you choose to use mats is a matter of personal preference. Personally, I prefer. At the very least, a single mat will keep your needlework and the acrylic from touching which is an absolute must!
The best rule of thumb I've heard for choosing a single mat's color is this: choose the 3rd most predominant color in your artwork. For a second, or even third mat, I don't know of a rule of thumb. I choose another color in the artwork. I don't have a formula for this, I just do a trial and error method. This is where my mat samples come in. The cover photo for this Santa had a white-ish and a dark red mat. Since I liked that combo, that's where I started. I grabbed a couple different red mats and put them on my piece to see which looked best.
In this instance, I preferred the darker one. Now to see it with the white-ish mat:
The standard amount for offsetting mats is ¼" so I tried to stack them about that much apart for the visual inspection. The two colors shown here are Maroon and Antique White.
Choosing a Frame
This is a bit rustic looking so I wanted a frame that was a tad rustic looking too. Unfortunately, I didn't take any photos with the frame sample(s). Basically, I would just leave the mats where they were in the previous photo and put the frame samples against the outside edge of my mats until I found the one that screamed, "Me!". In this case, Wood Gold Cream (WX354) screamed the loudest.
If you have a dark wall, frames with a metallic finish are going to stand out well against your wall. Try to avoid frames that match your wall because they will blend in too much and your entire piece won't "pop" like it deserves to.
If you are not using any mats, you will need spacers to keep a distance between your needlework and your acrylic/glass.
If you buy an "off the shelf" frame you are going to want to make sure that the area where the cross stitch goes is deep enough to accommodate your glass, mats, and fabric on foamcore. Most stock frames are made for flat items like prints and photographs. You would be checking the area in red:
Finishing Kits
Needlework should be mounted on foamcore. Acid-free is, of course, the best option.
Acrylic or glass? The main purpose of either is to protect your needlework from the "elements": dust, pet hair, etc. I go with acrylic mainly because it is what PictureFrames.com offers. There are advantages: it's lighter, less expensive, and more shatter resistant. Yes, you can get acrylic that protects from UV. Yes, you can get non-glare acrylic too. Non-glare and UV Protective are not the same thing. Non-glare is only what it says. If you are using more than one mat, non-glare will cause your needlework to look blurry because of its distance from the stitching.
Hanging hardware. After having used both sawtooth and wire options, I give wire hangers two thumbs up...or a high five, fist bump, whatever. Wire is stronger and much more adjustable. It also comes standard with most framing packages or at least it should. PictureFrames.com automatically includes it with any frame purchase.
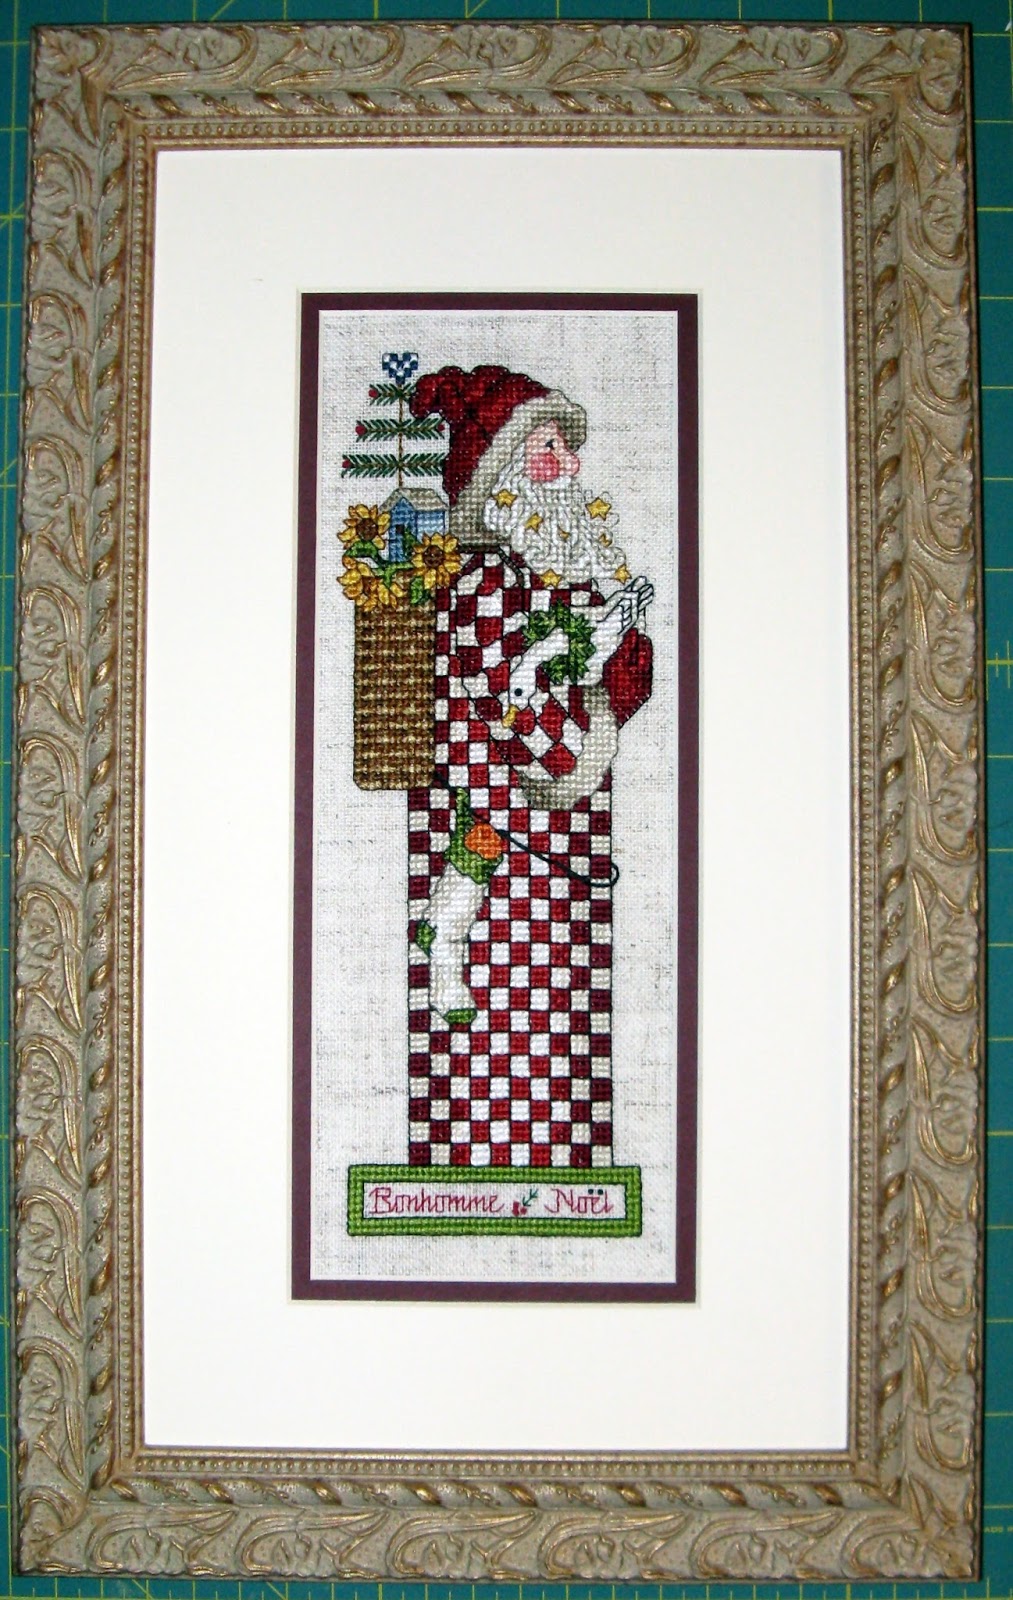
Here's a photo of this Santa all framed:
Part two of this tutorial series will cover washing your project.
Happy Stitching!
Stacy
Monday, July 27, 2015
Tuesday, July 7, 2015
Dragonflies WIP update
Well, I finished another page (partial) on my QS Dragonflies! I've now completed the first 3 pages and the top row.
I've made a start on the 4th page already. If I'm lucky, I'll finish this in time for this round of the HAED Reward Program.
In other news, I've added a few books to my Etsy shop, XedStitches. I've also started switching the postage to calculated shipping. That means that I'll ship to almost anywhere in the world now! Unfortunately, postage from the US to anywhere else is expensive but hopefully, the exchange rate will be in your favor.
Happy Stitching!
Stacy
I've made a start on the 4th page already. If I'm lucky, I'll finish this in time for this round of the HAED Reward Program.
In other news, I've added a few books to my Etsy shop, XedStitches. I've also started switching the postage to calculated shipping. That means that I'll ship to almost anywhere in the world now! Unfortunately, postage from the US to anywhere else is expensive but hopefully, the exchange rate will be in your favor.
Happy Stitching!
Stacy
Labels:
cross stitch,
Dragonflies,
etsy,
HAED,
Heaven and Earth Designs,
photo,
progress,
shop,
wip
Wednesday, July 1, 2015
HAP SAL July Update + other WIP
Hello Everyone!
It's hard to believe another month has gone by! Let's get right to the important stuff: progress photos!
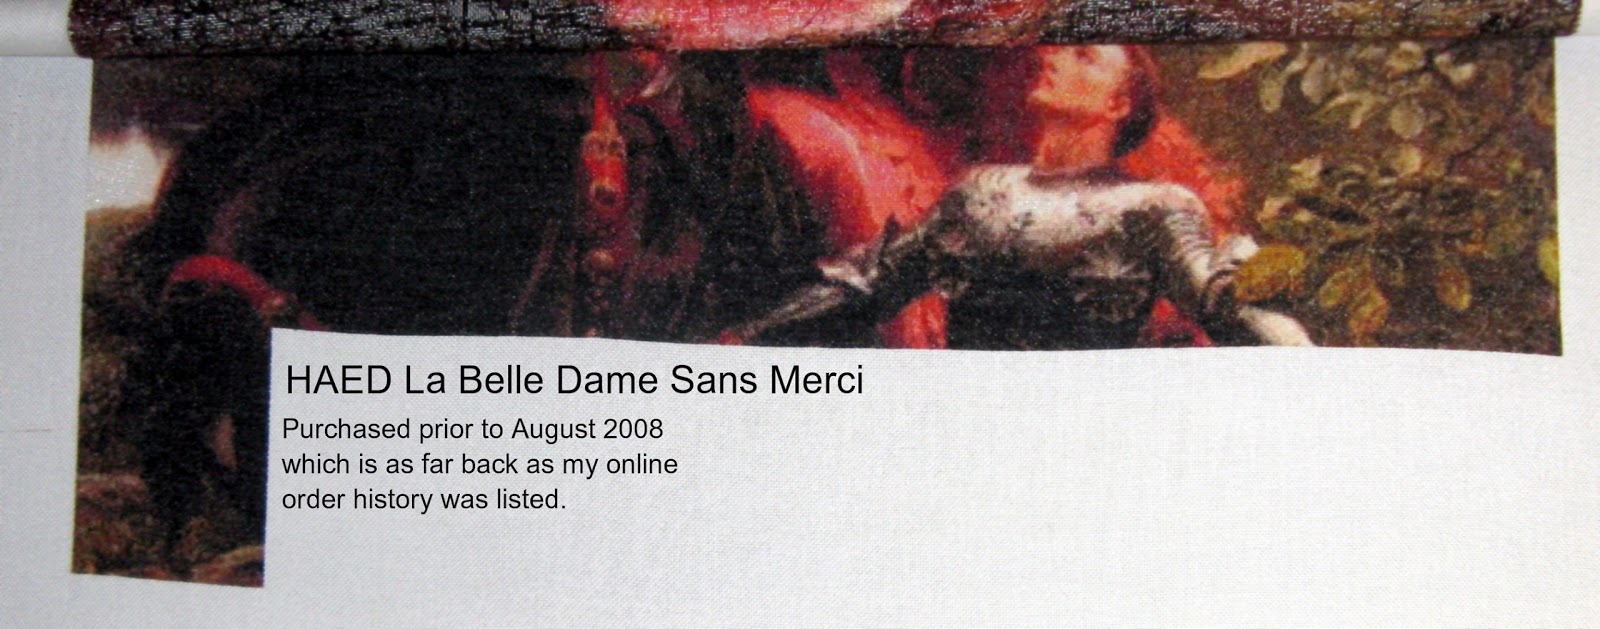
First up will be La Belle Dame Sans Merci.
Here's my where I was in May and here's where I finished in June:
I've gone from 49.16% to 51.61%. I'm officially past the halfway mark!
You'll probably notice that my images now have the designer and order information on them. That was inspired by this blog post. It's an effort to show our support for the designers by proving we have legal patterns that we are working from.
I started working on one of my other HAPs, Floral Finesse from The Heart's Content:
I have no idea of the % I have done. I'll probably try to figure it out when I finish the area on the right of the fabric.
While it's not part of my HAPs, I did finish another page on my QS Dragonflies. That's 2 pages out of 12 now.
Happy Stitching!
Stacy
It's hard to believe another month has gone by! Let's get right to the important stuff: progress photos!
First up will be La Belle Dame Sans Merci.
Here's my where I was in May and here's where I finished in June:
I've gone from 49.16% to 51.61%. I'm officially past the halfway mark!
You'll probably notice that my images now have the designer and order information on them. That was inspired by this blog post. It's an effort to show our support for the designers by proving we have legal patterns that we are working from.
I started working on one of my other HAPs, Floral Finesse from The Heart's Content:
I have no idea of the % I have done. I'll probably try to figure it out when I finish the area on the right of the fabric.
While it's not part of my HAPs, I did finish another page on my QS Dragonflies. That's 2 pages out of 12 now.
Happy Stitching!
Stacy
Labels:
cross stitch,
Dragonflies,
floral finesse,
HAED,
HAP,
heart's content,
Heaven and Earth Designs,
La Belle Dame Sans Merci,
photo,
progress,
QS,
SAL,
wip
Friday, June 26, 2015
2 HAED progress photos
Hey Everyone!
I never thought I'd say this but "It's too hot!". Well, not yet, it's still early in the day as I write this. I don't live on the beach, but I am near the coast. That means we don't really have seasons, just rainy and not-rainy. So when we do get warm weather, it's rare and usually brutally humid. Today's high is supposed to be 78°F (26°C) with 84% humidity. It's just supposed to get hotter through the weekend. Ugh!
The heat hasn't stopped me from stitching though! I've been working on 2 HAEDs at the same time. One of them is a QS (quick stitch) and only uses black so I can stitch on that during the day while I'm working. I don't consider it part of my "official rotation" because it's the only one I can work on during office hours.
Here is my first page finish on QS Dragonflies:
The fabric is 28ct. Cashel linen called Monet from Picture This Plus. I bought mine at 123stitch. I'm stitching this 1x1 (one strand of floss over one fabric thread).
In my rotation, my latest project was my focus piece La Belle Dame Sans Merci. Last night, I had another page finish! Woo hoo!
Next up in my rotation is Floral Finesse, finally! This is a new start so no progress photo...yet. I'll post one in a couple of days when I do my monthly HAP SAL progress report.
Happy Stitching!
Stacy
I never thought I'd say this but "It's too hot!". Well, not yet, it's still early in the day as I write this. I don't live on the beach, but I am near the coast. That means we don't really have seasons, just rainy and not-rainy. So when we do get warm weather, it's rare and usually brutally humid. Today's high is supposed to be 78°F (26°C) with 84% humidity. It's just supposed to get hotter through the weekend. Ugh!
The heat hasn't stopped me from stitching though! I've been working on 2 HAEDs at the same time. One of them is a QS (quick stitch) and only uses black so I can stitch on that during the day while I'm working. I don't consider it part of my "official rotation" because it's the only one I can work on during office hours.
Here is my first page finish on QS Dragonflies:
The fabric is 28ct. Cashel linen called Monet from Picture This Plus. I bought mine at 123stitch. I'm stitching this 1x1 (one strand of floss over one fabric thread).
In my rotation, my latest project was my focus piece La Belle Dame Sans Merci. Last night, I had another page finish! Woo hoo!
Next up in my rotation is Floral Finesse, finally! This is a new start so no progress photo...yet. I'll post one in a couple of days when I do my monthly HAP SAL progress report.
Happy Stitching!
Stacy
Labels:
cross stitch,
Dragonflies,
HAED,
Heaven and Earth Designs,
La Belle Dame Sans Merci,
photo,
progress,
QS,
rotation,
wips
Monday, June 1, 2015
HAP SAL Progress Report
Boy how time does fly! It's time once again, for the HAP SAL update.
I had to look at last month's update to figure out what I'd actually worked on since then.
I did finish that partial page on La Belle Dame. So it went from this to this:
Not a huge difference, but it was progress. Actually, that means I had a row finish! Woo hoo!
After the partial page on La Belle Dame, my randomizer app chose Rapunzel (Dawe) as my next project.
Here she was at the beginning of the year and after the page finish I had a couple of days ago:
She now has one eye, which is great but still kind of creepy. That means that Rapunzel has now gone from 30.3% to 35.05% done.
I did switch back to La Belle Dame a couple of days ago, but I've also been painting another piece of furniture so I've only put in a couple hundred stitches - no photo.
Happy Stitching!
Stacy
I had to look at last month's update to figure out what I'd actually worked on since then.
I did finish that partial page on La Belle Dame. So it went from this to this:
Not a huge difference, but it was progress. Actually, that means I had a row finish! Woo hoo!
After the partial page on La Belle Dame, my randomizer app chose Rapunzel (Dawe) as my next project.
Here she was at the beginning of the year and after the page finish I had a couple of days ago:
She now has one eye, which is great but still kind of creepy. That means that Rapunzel has now gone from 30.3% to 35.05% done.
I did switch back to La Belle Dame a couple of days ago, but I've also been painting another piece of furniture so I've only put in a couple hundred stitches - no photo.
Happy Stitching!
Stacy
Labels:
cross stitch,
HAED,
HAP,
Heaven and Earth Designs,
La Belle Dame Sans Merci,
photos,
rapunzel,
SAL,
wip
Monday, May 18, 2015
New-ish furniture in my stitching room!
I have a table next to my stitching chair to hold my stitching accessories and iPad while I'm stitching. It's not the best setup so I've been looking for something else.
Here's the culprit:
The table is just one of those cheap round things with the screw-on legs. The doily is fine - I made it! There's not a lot of surface room and I have to have ALL my stuff that I might need out and in the way. It also doesn't help that the cat loves to walk under it and occasionally tries to pull the doily (and everything on top) off the table.
So, I've been looking for a small chest of drawers to replace this unfortunate thing. Thanks to my hubby, I was able to get this for no money! He swapped some stuff he'd gotten out of a storage unit (think Storage Hunters) for this at a local second-hand store:
Now it's not really easy to tell from this photograph but this needed some work. Plus, it was a tad too traditional for my craft room.
Here are the rest of the before photos:
Now for the directions on the transformation.
Step 1:
Remove the hardware:
The hardware was, thankfully, easy to remove. Two screws for each handle and they just came right off! I had more trouble finding a screwdriver in my husband's toolbox than I did in taking the handles off.
Step 2:
Sanding
Now hubby was very helpful in letting me use his palm sander. Since I'd never used it before, he put the first piece of sandpaper on for me but made sure that I knew how to do it so that I could change it when it wore out. That bit was easy.
I was using 60 grit sandpaper. If you've never used sandpaper, I'll tell you this: the lower the grit number, the coarser the sandpaper. I really should have been using 40 grit or lower. The finish on this really didn't want to come off! I ended up using the entire package of 60 grit.
The edges of the drawers and the bottom/feet of the piece I had to do by hand. That was fun (heavy sarcasm here). I actually still had to do the left side of the chest after I'd run out of the 60 grit. I'd noticed that the finish seemed a bit gummy and I knew the 100 grit that I had available wasn't going to work so I improvised. We always have a bunch of razor blades around our house (the kind you put in a utility knife, not the kind you shave with), so I grabbed one of them. I used the razor blade like a scraper and took off quite a bit of the remaining finish that way. It even worked on the curve of the foot area! I then used a piece of the 100 grit to do the little bit of finish the blade didn't get. Whew! I'm tired just writing this!
All total, it took me about an hour each evening for 3 evenings. Either my back would start to hurt or my hands would get too tired so I'd quite for the night.
Here it is all sanded.
On the side, near the top, you can probably see where I broke the rule: "Go with the grain". Seriously, that was the only way I could get in there!
Step 3:
Wipe down.
I didn't take photos of this 'cause it was rather boring. Take a damp cloth and wipe the whole piece down. You need to make sure you've gotten all the sawdust off the piece. Let it dry before proceeding to paint.
Step 4:
Hardware prep.
First I needed to determine if the hardware was actual brass or something else. With a handy dandy magnet, I discovered it was not brass. The magnet stuck to it, so it wasn't brass. Hallelujah! (Brass is more difficult to paint.). I gave the hardware a good cleaning with soap and water and a metal scouring pad. Most directions I found said to use steel wool but I didn't have any.
Step 5:
Priming/Painting the hardware.
Ok, I kind of merged this step. Priming and painting should have been separate steps. I already had silver metallic spray paint which I was planning to use. It turns out that it was paint and primer in one! Yeah, me! I took the pieces out to my carport to do this bit. Since it was quite windy, I placed them in a cardboard box with the opening facing me (rather than facing the sky). I sprayed them all, then using a toothpick, I swung the moving part of the handle to the other side and sprayed them again.
They were dry to the touch after 15 minutes so I brought them inside to finish "curing".
Step 6:
Priming/Painting the Drawers
I had thought about doing the finish where you spray paint through a lace curtain panel but I couldn't be bothered to go shopping for one. Yes, I turned down the chance to shop. I was tired.
I did want to have some sort of accent on the finished piece so I thought I'd paint part of the drawer fronts using the same silver paint that I used on the hardware. Out came the painter's tape. The drawer fronts have 3 distinct areas: the center where the hardware was, a medium-sized border area, and a narrow border. I chose to paint the medium-sized border with the silver.
I masked the center panel and the outer border to prevent getting paint on them. Then I sprayed the silver paint on each drawer. I then went back over each drawer immediately just to make sure I had enough paint on them. After about 15 minutes, I took off all the painter's tape. I wanted the paint to be dry to the touch but not necessarily completely dry. If it was too dry, removing the tape might have taken some of the paint with it.
Here they are painted before I took the tape off:
You can see some of the blue from the tape showing through.
And here they are with the tape removed:
Step 7:
Prime/Paint the rest of the piece.
Again, I didn't want this to be a two-step process so I splurged a bit. I purchased Behr Premium Plus Ultra (paint/primer in one - interior). I bought a full gallon because I am going to use it on other projects - a quart would have been more than sufficient for this chest of drawers. I chose a flat finish. The color is called Starless Night.
I started with the drawers. I taped over the silver all the way to the edge so I could paint the center panel of each drawer. I left the tape on for about 10-15 minutes which was a bit too long. While the silver paint had dried overnight, a little bit of it did come off with the tape.
So to keep a nice line between the silver area and the outer edge of the drawer, I placed the tape, painted and immediately removed the tape. No silver came off and I had a clean edge! When I was painting the edges, I didn't paint toward the tape, I painted from a bit over the tape toward the edge. That way, I wasn't "shoving" paint under the edge of the tape.
Here is one of the drawers all painted with the hardware reattached:
I did paint the interior of the drawers as well because they were a bit stained.
Next I painted the body of the piece. I can recommend spending more money on a paint brush than I did. I bought a 2in. wide brush that was under $5. Spend more...really! Here's what happens when you don't:
That's just a few of the bristles that I had to pick off the cabinet that were stuck in the paint. I had to use a pair of tweezers to grab them. The irony is that I finished painting the cabinet with a smaller brush by the same brand with no problems. Go figure.
Here is the completed chest of drawers:
Here's roughly what it cost me to do this project. I did try to list the prices with the sales tax included.
The top drawer now holds the remotes for my tv and dvd player, nail clippers, chapstick, and nail file.
The middle drawer holds my binder with the keys, charts, photos for the WIPs in my rotation.
The bottom drawer is the "snack drawer". Shhhh! Right now, it has a package of coconut cookies.
Happy Stitching!
Stacy
Here's the culprit:
The table is just one of those cheap round things with the screw-on legs. The doily is fine - I made it! There's not a lot of surface room and I have to have ALL my stuff that I might need out and in the way. It also doesn't help that the cat loves to walk under it and occasionally tries to pull the doily (and everything on top) off the table.
So, I've been looking for a small chest of drawers to replace this unfortunate thing. Thanks to my hubby, I was able to get this for no money! He swapped some stuff he'd gotten out of a storage unit (think Storage Hunters) for this at a local second-hand store:
Now it's not really easy to tell from this photograph but this needed some work. Plus, it was a tad too traditional for my craft room.
Here are the rest of the before photos:
Now for the directions on the transformation.
Step 1:
Remove the hardware:
The hardware was, thankfully, easy to remove. Two screws for each handle and they just came right off! I had more trouble finding a screwdriver in my husband's toolbox than I did in taking the handles off.
Step 2:
Sanding
Now hubby was very helpful in letting me use his palm sander. Since I'd never used it before, he put the first piece of sandpaper on for me but made sure that I knew how to do it so that I could change it when it wore out. That bit was easy.
I was using 60 grit sandpaper. If you've never used sandpaper, I'll tell you this: the lower the grit number, the coarser the sandpaper. I really should have been using 40 grit or lower. The finish on this really didn't want to come off! I ended up using the entire package of 60 grit.
The edges of the drawers and the bottom/feet of the piece I had to do by hand. That was fun (heavy sarcasm here). I actually still had to do the left side of the chest after I'd run out of the 60 grit. I'd noticed that the finish seemed a bit gummy and I knew the 100 grit that I had available wasn't going to work so I improvised. We always have a bunch of razor blades around our house (the kind you put in a utility knife, not the kind you shave with), so I grabbed one of them. I used the razor blade like a scraper and took off quite a bit of the remaining finish that way. It even worked on the curve of the foot area! I then used a piece of the 100 grit to do the little bit of finish the blade didn't get. Whew! I'm tired just writing this!
All total, it took me about an hour each evening for 3 evenings. Either my back would start to hurt or my hands would get too tired so I'd quite for the night.
Here it is all sanded.
On the side, near the top, you can probably see where I broke the rule: "Go with the grain". Seriously, that was the only way I could get in there!
Step 3:
Wipe down.
I didn't take photos of this 'cause it was rather boring. Take a damp cloth and wipe the whole piece down. You need to make sure you've gotten all the sawdust off the piece. Let it dry before proceeding to paint.
Step 4:
Hardware prep.
First I needed to determine if the hardware was actual brass or something else. With a handy dandy magnet, I discovered it was not brass. The magnet stuck to it, so it wasn't brass. Hallelujah! (Brass is more difficult to paint.). I gave the hardware a good cleaning with soap and water and a metal scouring pad. Most directions I found said to use steel wool but I didn't have any.
Step 5:
Priming/Painting the hardware.
Ok, I kind of merged this step. Priming and painting should have been separate steps. I already had silver metallic spray paint which I was planning to use. It turns out that it was paint and primer in one! Yeah, me! I took the pieces out to my carport to do this bit. Since it was quite windy, I placed them in a cardboard box with the opening facing me (rather than facing the sky). I sprayed them all, then using a toothpick, I swung the moving part of the handle to the other side and sprayed them again.
They were dry to the touch after 15 minutes so I brought them inside to finish "curing".
Step 6:
Priming/Painting the Drawers
I had thought about doing the finish where you spray paint through a lace curtain panel but I couldn't be bothered to go shopping for one. Yes, I turned down the chance to shop. I was tired.
I did want to have some sort of accent on the finished piece so I thought I'd paint part of the drawer fronts using the same silver paint that I used on the hardware. Out came the painter's tape. The drawer fronts have 3 distinct areas: the center where the hardware was, a medium-sized border area, and a narrow border. I chose to paint the medium-sized border with the silver.
I masked the center panel and the outer border to prevent getting paint on them. Then I sprayed the silver paint on each drawer. I then went back over each drawer immediately just to make sure I had enough paint on them. After about 15 minutes, I took off all the painter's tape. I wanted the paint to be dry to the touch but not necessarily completely dry. If it was too dry, removing the tape might have taken some of the paint with it.
Here they are painted before I took the tape off:
You can see some of the blue from the tape showing through.
And here they are with the tape removed:
Step 7:
Prime/Paint the rest of the piece.
Again, I didn't want this to be a two-step process so I splurged a bit. I purchased Behr Premium Plus Ultra (paint/primer in one - interior). I bought a full gallon because I am going to use it on other projects - a quart would have been more than sufficient for this chest of drawers. I chose a flat finish. The color is called Starless Night.
I started with the drawers. I taped over the silver all the way to the edge so I could paint the center panel of each drawer. I left the tape on for about 10-15 minutes which was a bit too long. While the silver paint had dried overnight, a little bit of it did come off with the tape.
So to keep a nice line between the silver area and the outer edge of the drawer, I placed the tape, painted and immediately removed the tape. No silver came off and I had a clean edge! When I was painting the edges, I didn't paint toward the tape, I painted from a bit over the tape toward the edge. That way, I wasn't "shoving" paint under the edge of the tape.
Here is one of the drawers all painted with the hardware reattached:
I did paint the interior of the drawers as well because they were a bit stained.
Next I painted the body of the piece. I can recommend spending more money on a paint brush than I did. I bought a 2in. wide brush that was under $5. Spend more...really! Here's what happens when you don't:
That's just a few of the bristles that I had to pick off the cabinet that were stuck in the paint. I had to use a pair of tweezers to grab them. The irony is that I finished painting the cabinet with a smaller brush by the same brand with no problems. Go figure.
Here is the completed chest of drawers:
Here's roughly what it cost me to do this project. I did try to list the prices with the sales tax included.
- Chest of drawers -
$10 list pricefree - Sandpaper - $4.50 for 60 grit package (5 sheets) + .75 for1 sheet of 100 grit sandpaper
- Paintbrushes, one 1" and one 2" - $6
- Silver Spray paint/primer - $4.50
- Gallon of Behr Paint/Primer - $40 but I have about 80% still left.
The top drawer now holds the remotes for my tv and dvd player, nail clippers, chapstick, and nail file.
The middle drawer holds my binder with the keys, charts, photos for the WIPs in my rotation.
The bottom drawer is the "snack drawer". Shhhh! Right now, it has a package of coconut cookies.
Happy Stitching!
Stacy
Friday, May 15, 2015
A bit of everything...
Hmm, where to start...
I did finish that little bit I had left on La Belle Dame Sans Merci. Here it is:
The next time I work on this, I'm going to have to roll the scroll frames. That means at least her head is going to disappear...I'm going to miss her!
The next project in my rotation is: Rapunzel (Dawe).
I hadn't been spending as much time as I normally do stitching lately. I'd been working on refinishing a piece of furniture for my craft room. Well, I did get it done...finally! Look for a separate post about what I did and how. ;-)
I've also started selling items featuring photographs that I've taken. Right now, I have 3 different places to shop depending on what you would want to buy. Please feel free to share these links with your friends! Any money I make helps pay bills and buy the occasional bit of stash. No, I'm not getting rich off this (bummer).
Framed prints, pillows, cards, canvas prints, and more: My FineArtAmerica shop.
Unframed Prints, stretched canvas prints, framed prints: SMC Photography
T-Shirts, jewelry, scarves, purses, wallets, and even flip flops!: Tease Tees - All Over Prints
Here are a few of the images that I have online so far:
I did finish that little bit I had left on La Belle Dame Sans Merci. Here it is:
The next time I work on this, I'm going to have to roll the scroll frames. That means at least her head is going to disappear...I'm going to miss her!
The next project in my rotation is: Rapunzel (Dawe).
I hadn't been spending as much time as I normally do stitching lately. I'd been working on refinishing a piece of furniture for my craft room. Well, I did get it done...finally! Look for a separate post about what I did and how. ;-)
I've also started selling items featuring photographs that I've taken. Right now, I have 3 different places to shop depending on what you would want to buy. Please feel free to share these links with your friends! Any money I make helps pay bills and buy the occasional bit of stash. No, I'm not getting rich off this (bummer).
Framed prints, pillows, cards, canvas prints, and more: My FineArtAmerica shop.
Unframed Prints, stretched canvas prints, framed prints: SMC Photography
T-Shirts, jewelry, scarves, purses, wallets, and even flip flops!: Tease Tees - All Over Prints
Here are a few of the images that I have online so far:
Labels:
cross stitch,
HAED,
Heaven and Earth Designs,
La Belle Dame Sans Merci,
photo,
photography,
photos,
wip
Subscribe to:
Posts (Atom)